How to Crochet the Wave Top
Crochet a crop-length top with a drop shoulder and ¾ sleeve using an undulating wave stitch pattern. Alternating compact stitch rows and open lacy rows create the distinctive textured stripes, with colour changes worked throughout.
The pattern includes sizes XS/S, M/L and XL/XXL, with guidance in the original pattern for customising the body length and width.
Project: Wave Top
Pattern: P337
Craft type: Crochet
Difficulty: Intermediate Crochet
This is a crop length top with a drop shoulder and ¾ sleeve. The pattern starts with an undulating stitch pattern that creates the wave formation for the rest of the rows; then alternating between compact stitch rows and open lacy rows, and changing colours for each. The model is wearing a size XS/S, and although sizes are provided below for body length and width, you can customise these measurements by adding rows for length, and stitches to the foundation chain for width.
Measurements
| XS/S | M/L | XL/XXL | |
|---|---|---|---|
| Shoulder Width | 50cm | 57cm | 64cm |
| Body Length Front (from shoulder strap) | 48cm | 53cm | 58cm |
| Sleeve Length | 34cm | 36cm | 38cm |
Yarn Required
| Makr ORGANIC COTTON Yarn 100g balls | XS/S | M/L | XL/XXL |
|---|---|---|---|
| Col A - Cream | 3 | 4 | 4 |
| Col B - Coral | 5 | 5 | 6 |
Needles and Equipment
- 4.5mm crochet hook
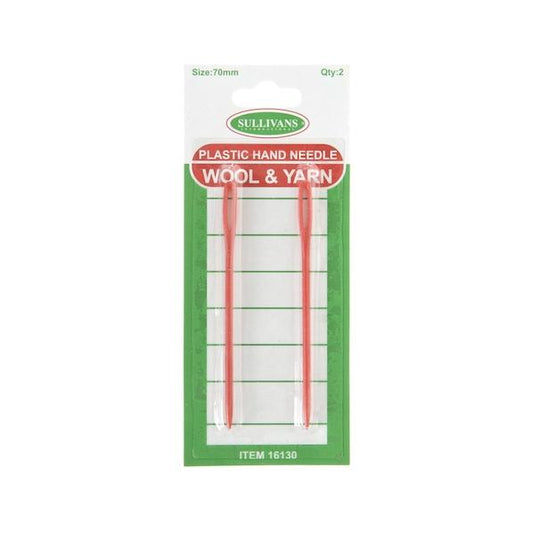
- Wool needle for sewing in ends
Tension
17st x 20rows Dc = 10cm x 10cm
Crochet Abbreviations
- Ch – chain
- Sk – skip
- Sl - slip stitch (sc)
- Sp – space
- Dc – double crochet
- Htr – half treble crochet
- Tr – Treble Crochet
- Dc2tog – double crochet together
WAVE TOP
BACK
Alternating colours each row; starting with Colour A.
Foundation Chain: Colour A: Chain (5,6,7) multiples of 16.
Wave Stitch Pattern:
Row 1. Colour A: Ch 3, Tr in 4th ch from hook. Repeat within ** across *Tr in next 2 ch, Htr in next 2 ch, Dc, Dc2tog, DC2tog, Dc, Htr, in next 2 ch, Tr, in next 2 ch, work 2 Tr in next 2 ch*.
End the row with 2 Tr in last ch. Turn.
Creates a compact/dense rib style stitch pattern:
Row 2. Colour B: Ch 3 (counts as first Tr), Tr in first ch. Repeat within ** across. *Tr in next 5 ch, Tr2tog, Tr2tog, Tr in next 5 st, work 2 Tr into next 2 ch,*. The row will end of 2Tr in the last ch. Turn.
Creates an open/lacey stitch pattern:
Row 3. Colour A: Ch 3 (counts as first Tr) Tr in same ch. Repeat with ** across. *(ch 1, sk next st. Tr) 3 times. Sk 2 ch, Tr. (Ch 1 sk next st. Tr ) 3 times. Ch 2, Tr in next ch*. End the row with 2 Tr in last ch. Turn.
Row 4. Colour B: ch 3 (counts as first Tr ) Tr in first ch. Repeat with in ** across. * Tr in next 5 ch, tr2tog, tr2tog, Tr in next 5 st, work 4 Tr in the ch 2 sp of the previous row*. The row will end on 2Tcr in last ch. Turn.
Repeat rows 3 and 4 until the length is (48,52,56,60)
Last Row: Colour A: Ch 1 (does not count as first Dc ) work 2 Dc in first st. Repeat within ** across. *Dc Htr, Htr, Tr, Tr, Tr2tog, Tr2tog, Tr, Tr, Htr, Htr, work 2 Dc in next two ch*. End row with 2 Dc in last ch.
FRONT
Repeat the steps of the Back, but stop when the Front Panel is 7 rows shorter than the Back Panel. Do not follow Last Row steps from the Back Panel directions.
NECKLINE
The scoop of the neck opening is located in the curved centre of the Front Panel. The collar will be worked individually on each side of the neckhole.
Row 1: Colour A: Ch 3 (counts as first Tr ) Tr in same ch. Repeat within ** until you reach the peak before the neckhole ‘scoop’. *(Ch 1, sk next ch. Tr ) 3 times. Sk 2 ch, Tr. *(Ch 1, sk next st. Tr ) 3 times. Ch 2, Tr in next ch*. End the row with 1 Tr in the middle Tr ch of previous 4Tr cluster. Turn.
Row 2: Colour B: Ch 2, T4 in next ch (this counts as a Tr2tog decrease). Tr in next 4 st, tr2tog, tr2tog. Repeat within ** across. *Tr in next 5 ch, work 4 Tr in the ch 2 sp of the previous row, Tr in next 5 ch, tc2tog, tc2tog *. The row will end on 2tr in last st. Turn.
Row 3: Colour A: Ch 3 (counts as first Tr) Tr in same ch. Repeat within ** until you reach the end of the row. *(Ch1, sk next ch. Tr ) 3 times. Sk 2 ch, Tr. *(Ch1, sk next ch. Tr) 3 times. Ch 2, Tr in next ch*. End the row with 1 Tr in the top of ch2 from previous row. Turn.
Row 4: Colour B: Ch 2, Tr in next ch (this counts as a dctog decrease). Tr in next ch. Tr2tog, Tr2tog. Repeat within ** across. *Tr in next 5 ch, tr2tog, tr2tog, Tr in next 5 ch, work 4 Tr in the ch 2 sp of the previous row*. The row will end on 2Tr in last ch. Turn.
Row 5: Colour A: Ch 3 (counts as first Tr ) Tr in same ch. Repeat with ** until you reach the end of the row. *(Ch 1, sk next ch. Tr ) 3 times. Sk 2 ch, Tr. (Ch 1, sk next ch, Tr) 3 times. Ch 2, Tr in next ch*. End the row with 1 Tr in each of the last 2 ch. Turn.
Row 6: Colour B: Ch 2, tr3tog (this counts as a tr4tog decrease). Tr in next 5 ch. Work 4 Tr in ch 2 sp of the previous row. Repeat within ** across. *Tr in next 5 ch, tr2tog, tr2tog, Tr in next 5 ch, work 4 Tr in the ch 2 sp of the previous row*. The row will end on a 2Tr in last ch. Turn.
Row 7: Colour A: Ch 1 (does not count as first Dc). Repeat within ** across. *Dc Htr, Htr, Tr, Tr, tr2tog, tr2tog, Tr, Tt, Htr, Htr, Dc, work 2 Dc in next two ch*. End row with 1 Tr in last ch. Tie off.
For XS/S go to opposite side. For other sizes repeat row 6 and 7 first then go to opposite side.
For the opposite side use the same colours for each row as you just did for the previous side
OPPOSITE SIDE
Row 1. Colour A: Tie yarn on at the 3rd Tr from the left with peak of row below. Ch 3 (counts as first Tr) Tr in next st. Repeat within ** until you reach the peak before the neck opening ‘scoop’. (Ch 1, sk next ch, Tr) 3 times. Sk 2 ch, Tr. *(Ch 1, sk next ch, Tr ) 3 times. Ch 2, Tr in next ch*. End the row with 2 Tr in last ch. Turn.
Row 2. Colour B: Ch 3. T4 in same ch. Tr in next 5 ch. Tr2tog, Tr2tog. Repeat with ** across. *Tr in next 5 ch, work 4 Tr in the ch 2 sp of the previous row, Tr in next 5 ch, tr2tog, tr2tog*. In the last 2 ch of the row, tr2tog. Turn.
Row 3. Colour A: Ch 4 (counts as first Tr and Ch 1) sk next ch, Tr in following ch. Ch 1, sk ch, Tc in next ch. sk 2 ch, Tc in next ch. Repeat within ** until you reach the end of the row. *(ch 1, sk next ch. Tr) 3 times. Ch 2, Tr in next ch. *(Ch 1, sk next ch. Tr) 3 times. Sk 2 ch, Tr *. End the row with 2 Tr in last ch. Turn.
Row 4. Colour B: Ch 3, Tr in same ch. Tr in next 5 ch, tr2tog tr2tog, Repeat within ** across *Tr in next 5 ch, work 4 Tr in the ch 2 sp of the previous row, Tr in next 5 ch, tr2tog, tr2tog *. The row will end with 2Trtog. Turn.
Row 5. Colour A: Ch 3 (counts as first Tr ) Tr in next st. Skip next 2 ch, Tr in following st. Repeat within ** until you reach the end of the row. *(Ch 1, sk next ch, Tr ) 3 times. Ch 2 Tr in next ch. (Ch 1, sk next ch, Tr ) 3 times. Sk 2 ch, Tr *. End the row with 2 Tr in last ch. Turn.
Row 6. Colour B: Ch 3, Tr in same ch. Repeat within ** across. *Tr in next 5 ch, tr2tog, tr2tog, Tr in next 5 ch, work 4 Tr in the ch 2 sp of the previous row*. The row will end with tr2tog decrease over the last 4 ch of the row. Turn.
Row 7. Colour A: Ch 3, tr2tog in next 2 ch, Tr, Tr, Htr, Htr, Dc. Work 2 Dc into each of the next ch. Repeat with ** across. *Dc, Htr, Htr, Tr, Tr, Tr2tog, tr2tog, Tr, Tr, Htr, Htr, Dc, work 2 Dc into next two ch*. Tie off.
For L-XXL Repeat row 6 and 7.
SLEEVES
Make 2 identical.
Colour A: Chain (4,5,5) multiples of 16.
Follow same pattern as for the Back panel, until sleeve measures (34,36,38)cm.
Finish off the sleeve with the Last Row steps for the Back Panel.
GARMENT CONSTRUCTION
Lay all garment pieces flat.
Attach back and front panel together at shoulders using slip st.
Attach sleeves to front and back panels, using slip st.
Fold sleeves and slip stitch front and back panels together.
NECKLINE BORDER
Using Colour A.
Join yarn at shoulder seam.
Row 1: Sl st Ch 1, Dc around neckline. Sl st into top of first Dc.
Alternative Yarns
The original pattern uses Makr ORGANIC COTTON Yarn. When choosing an alternative yarn, select a yarn that can achieve the original tension of 17st x 20rows Dc = 10cm x 10cm using a 4.5mm crochet hook.
Suitable Yarn Types
- Organic cotton yarn – the closest fibre substitute for the original project.
- 8ply cotton yarn – provides stitch definition and structure for the wave pattern.
- Cotton-acrylic blend – may create a lighter fabric with easier care.
- Cotton-bamboo blend – can provide extra softness and drape.
- Recycled cotton blend – may be suitable provided the required tension is achieved.
Customisation Ideas
- Adjust the body length by adding or removing pattern rows as described in the original pattern.
- Adjust the width by changing the number of 16-stitch multiples in the foundation chain.
- Use high-contrast colours to emphasise the alternating dense and open lace rows.
- Create a tonal version using two shades from the same colour family.
- Use a single colour throughout for a more subtle textured finish while retaining the original stitch pattern.
- Customise sleeve length by working the Back panel pattern to your preferred measurement before completing the Last Row.
When changing the garment width, retain foundation chain multiples of 16 as specified in the original pattern. Check measurements regularly to maintain the intended fit and wave pattern placement.
Care Instructions
Follow the washing and care instructions provided on the ball band of the yarn used.
- Sew in all ends securely before washing.
- Wash using the method and temperature recommended for the selected yarn.
- Avoid excessive heat that may shrink or distort cotton fibres.
- Gently reshape the wave pattern and neckline after washing.
- Lay flat to dry where appropriate to help maintain the garment measurements.
- Store folded rather than hanging to help prevent the drop shoulders and sleeves from stretching.