Make this adorable floppy bunny ears hat as a little Easter project or all year round as a fun family project. This is an easy crochet pattern that is worked in the round from the top down, and the ears are worked in a spiral. The contrast colour inner flap is an optional add on. Size is suitable for 2 - 5 yrs old.

How to Crochet a Floppy Bunny Hat
Make an adorable bunny hat with long floppy ears for Easter dress-ups, imaginative play or cosy everyday wear. The hat is crocheted from the top down in joined rounds, while the ears are worked separately in continuous spirals and sewn into position.
A textured lower band gives the hat a snug fit around the head. The contrast-colour inner-ear panels shown in the project image are optional and can be added for extra colour and definition.
Project: Crochet Bunny Hat
Pattern: P390
Craft type: Crochet
Difficulty: Easy
Finished Measurements
| Recommended age | Head circumference | Hat height |
|---|---|---|
| Approximately 2–5 years | Approximately 40 cm | Approximately 20 cm, including the band |
What You Will Need
Yarn
The original pattern uses Makr Cottage Loom:
- Main colour: 2 balls in Smokey Grey
- Contrast colour: 1 ball in Pearlescent Beige for the optional inner ears
Hook and Equipment
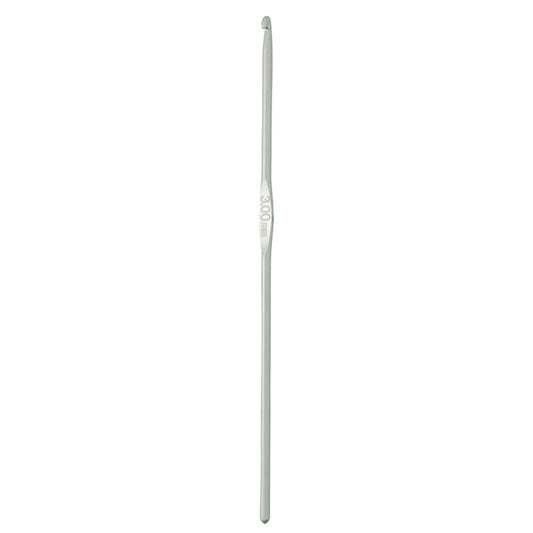
- 6 mm crochet hook
- Stitch marker
- Wool or tapestry needle
- Scissors
- Measuring tape
- Removable pins or clips for positioning the ears
Tension
The source lists the following tension:
10 stitches and 11 rows over 10 cm in double crochet.
Make a tension square before beginning. The hat should feel comfortably firm but still stretch over the head without becoming stiff.
Abbreviations
- Bl: Back loop
- Ch or chs: Chain or chains
- Dc: Double crochet
- Hdc: Half double crochet
- PM: Place marker
- Sl st: Slip stitch
- St or sts: Stitch or stitches
Construction Overview
The bunny hat is made in three main stages:
- Crochet the hat from the crown downwards.
- Add the textured rib-style lower band.
- Crochet two long ears and sew them to the crown.
The hat is worked in joined rounds with the right side facing out. Each round is joined to the first half double crochet with a slip stitch.
The ears are worked in continuous spirals. Do not join the ear rounds with a slip stitch unless the instructions specifically direct you to do so.
Begin the Crown
Round 1
- Using the main colour, make a magic ring.
- Chain 1.
- Work 8 half double crochet stitches into the ring.
- Join to the first stitch with a slip stitch.
You should have 8 stitches.
Round 2
- Chain 1.
- Work 2 half double crochet stitches into every stitch around.
- Join with a slip stitch.
You should have 16 stitches.
Round 3
Work 2 half double crochets into the first stitch, followed by one half double crochet into the next stitch. Repeat around and join.
You should have 24 stitches.
Round 4
Work 2 half double crochets into the first stitch, then one half double crochet into each of the next two stitches. Repeat around and join.
You should have 32 stitches.
Round 5
Work 2 half double crochets into the first stitch, then one half double crochet into each of the next three stitches. Repeat around and join.
You should have 40 stitches.
Round 6
Work 2 half double crochets into the first stitch, then one half double crochet into each of the next four stitches. Repeat around and join.
You should have 48 stitches.
Crochet the Hat Body
For Rounds 7–15, work one half double crochet into every stitch around and join each round with a slip stitch.
Maintain 48 stitches throughout this section.
Try the hat on the intended wearer, or compare it with a well-fitting hat, before beginning the lower band. Work an additional plain round where more depth is required.
Add the Rib-Style Band
The lower band alternates plain double crochet rounds with back-loop-only rounds to create horizontal ridges.
Band Round 1
- Chain 1.
- Work one double crochet into every stitch around.
- Join with a slip stitch.
Band Round 2
- Chain 1.
- Work one double crochet through the back loop only of every stitch around.
- Join with a slip stitch.
Repeat these two rounds four times, or until the band reaches the desired depth.
Fasten off and weave in the yarn end.
Crochet the First Ear
Work each ear in a continuous spiral. Place a stitch marker in the final stitch of the first round and move it upwards after every completed round.
Ear Round 1
- Make a magic ring in the main colour.
- Chain 1.
- Work 6 half double crochet stitches into the ring.
You should have 6 stitches.
Ear Round 2
Work 2 half double crochet stitches into the first stitch, followed by one half double crochet into each of the next two stitches. Repeat around.
You should have 8 stitches.
Ear Round 3
Work 2 half double crochet stitches into the first stitch, followed by one half double crochet into each of the next three stitches. Repeat around.
You should have 10 stitches.
Ear Round 4
Work 2 half double crochet stitches into the first stitch, followed by one half double crochet into each of the next four stitches. Repeat around.
You should have 12 stitches.
Ear Round 5
Increase evenly around according to the pattern until the ear contains 16 stitches.
Ear Round 6 and Following Rounds
Work one half double crochet into every stitch around.
Continue until the ear measures approximately 27 cm.
Fasten off, leaving a yarn tail approximately 50 cm long for attaching the ear.
Make the Second Ear
Repeat the complete ear instructions to make a second matching ear.
Place the two ears side by side and compare their length and width before fastening off completely.
Add Optional Contrast Inner Ears
The source image shows a contrasting inner section inside each floppy ear, although separate instructions are not included in the written pattern.
To create a similar effect, crochet or cut two narrow panels that are slightly shorter and narrower than the finished ears.
Simple Crocheted Inner-Ear Option
- Using the contrast yarn, chain a length slightly shorter than the ear.
- Work backwards and forwards in half double crochet, shaping the upper end into a rounded point.
- Make the panel approximately two-thirds the width of the outer ear.
- Position it centrally and sew around the outer edge with matching yarn.
Keep the stitching relaxed so the ears retain their natural drape.
Position the Ears
The ears should be positioned approximately four rounds below the top of the hat and slightly towards the front.
- Lay the hat flat with the front facing upwards.
- Flatten the lower edge of each ear.
- Place the ears at a slight outward angle rather than pointing straight upwards.
- Pin or clip both ears into position.
- Check the placement from the front, back and sides.
Attach the Ears
- Thread the long yarn tail from the first ear onto a tapestry needle.
- Whip stitch through the flattened lower edge of the ear and the hat fabric.
- Sew across the base more than once for extra strength.
- Secure the yarn on the inside of the hat and weave in the end.
- Repeat for the second ear.
Avoid sewing through too large an area of the hat, as this may create a stiff or puckered section around the crown.
Finishing the Hat
- Weave in all remaining yarn ends.
- Check that both ears are securely attached.
- Gently shape the crown and band by hand.
- Arrange the ears so they fall naturally.
- Lightly block according to the yarn-care instructions.
Alternative Yarns for This Project
A suitable substitute should create a soft but substantial fabric and achieve approximately 10 stitches and 11 rows over 10 cm.
- 12 ply wool and acrylic blend – offers warmth, softness and good shape recovery.
- 12 ply anti-pilling acrylic – an easy-care option for a children’s hat.
- Chunky machine-washable wool – creates a warm, natural hat with good elasticity.
- Aran or light chunky merino blend – produces a soft, premium finish when the tension matches.
- Chunky cotton and acrylic blend – creates a cooler hat suitable for dress-up wear in milder weather.
- Two strands of 8 ply yarn held together – can be used to create the required thickness and custom colour combinations.
Choosing the Best Substitute
Choose a yarn with enough structure to support the long ears without making the hat too heavy. Smooth or lightly textured yarns make the stitches easier to see and help the ribbed band remain defined.
Avoid extremely heavy, dense or loosely spun yarns. Heavy yarn may pull the hat backwards, while fragile roving yarn may pill or separate at the ear attachments.
Size Adjustments
To make a smaller hat, stop the crown increases before reaching 48 stitches and work fewer body rounds.
To make a larger hat, continue the crown increases by adding one more plain stitch between increases on each new round. Once the required diameter is reached, work straight to the desired depth.
When adjusting the size, check that the final stitch count suits the band pattern and that the ears remain proportionate to the hat.
Colour Ideas
- Grey with beige inner ears
- Cream with blush-pink inner ears
- Caramel with oatmeal
- Pastel blue with white
- Lilac with dusty pink
- Charcoal with pale grey
- One solid colour for a simple woodland look
Child Safety
- Secure the ears firmly before every use.
- Avoid beads, buttons or detachable decorations.
- Do not add long ties or cords around the neck.
- Supervise young children while wearing dress-up accessories.
- Check the hat regularly for loose yarn or damaged seams.
Care
Follow the care instructions on the selected yarn label. Hand washing or a gentle machine cycle is generally safest for preserving the ear shape.
Reshape the hat and ears while damp, then dry flat. Avoid hanging the wet hat, as the weight of the ears may stretch the crown.