How to Crochet a Christmas Cockatoo Ornament
Create a cheerful Australian Christmas ornament featuring a white cockatoo perched on a branch with red berries and green leaves. The cockatoo is crocheted in separate pieces, lightly stuffed and assembled with a silver hanging loop at the top.
The head and body are worked as one piece in continuous spirals. Separate wings, crest feathers, beak and tail add shape and character, while the branch and foliage complete the festive design.
Project: Christmas Critter Cockatoo
Pattern: A376
Designer: Janine Tsakisiris
Craft type: Crochet
Difficulty: Easy
Finished Measurement
The completed ornament measures approximately 14 cm high when hanging.
What You Will Need
Yarn
The original project uses Lincraft DK 8 Ply yarn:
- Main colour: White, 1 ball
- Colour 1: Butter yellow, 1 ball
- Colour 2: Brown, 1 ball
- Colour 3: Charcoal, small amount
- Colour 4: Marle grey, small amount
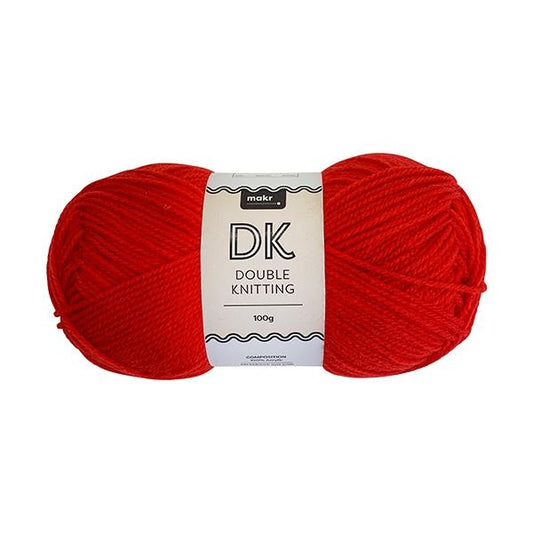
- Colour 5: Fire red, small amount
- Colour 6: Bottle green, small amount
Hook and Equipment
- 3 mm crochet hook, or a size that creates a firm fabric without visible holes
- Wool needle for assembly
- Siliconised toy stuffing
- Silver embroidery thread
- Stitch marker, if desired
- Scissors
Tension
Exact tension is not important for this project. However, the stitches should be tight enough that the stuffing does not show through the fabric.
Use a smaller hook when gaps are visible between stitches. A firm fabric will also help the ornament retain its shape.
Abbreviations
- Ch: Chain
- Dc: Double crochet
- Htr: Half treble crochet
- Tr: Treble crochet
- Dtr: Double treble crochet
- Sl st: Slip stitch
- Inc: Work two stitches into one stitch
- Decrease: Work one double crochet over the next two stitches
- Mr: Magic ring
- St or sts: Stitch or stitches
Construction Overview
The ornament is made from the following components:
- One head and body piece
- Two eyes
- One beak
- Three crest feathers
- Two wings
- One tail feather
- One branch
- Two red berries
- One large leaf
- One small leaf
- One silver hanging ring
Most components are worked in continuous spirals. Use a stitch marker to identify the beginning of each round.
Crochet the Head and Body
Using the main white yarn and a 3 mm hook, work 6 double crochet stitches into a magic ring.
Shape the Head
- Increase into every stitch to create 12 stitches.
- Work one double crochet, then increase in the next stitch. Repeat around to create 18 stitches.
- Work two double crochets, then increase in the next stitch. Repeat around to create 24 stitches.
- Work one round without increasing.
- Work three double crochets, then increase in the next stitch. Repeat around to create 30 stitches.
- Work two rounds without increasing.
Continue Widening the Body
Continue increasing more gradually:
- Increase three times to reach 33 stitches.
- Work two plain rounds.
- Increase three times to reach 36 stitches.
- Work two plain rounds.
- Increase three times to reach 39 stitches.
- Work two plain rounds.
- Increase three times to reach 42 stitches.
- Work three plain rounds.
The upper section forms the head, while the gradual increases create the rounded body.
Shape the Lower Body
Begin decreasing as follows:
- Work 12 double crochets, then decrease. Repeat three times to reach 39 stitches.
- Work 11 double crochets, then decrease. Repeat three times to reach 36 stitches.
- Work four double crochets, then decrease. Repeat six times to reach 30 stitches.
- Work three double crochets, then decrease. Repeat six times to reach 24 stitches.
Begin adding stuffing and continue filling the ornament as the opening becomes smaller.
- Decrease around to reach 12 stitches.
- Decrease around again to reach 6 stitches.
Fasten off, leaving a long yarn tail. Add the final stuffing, thread the tail through the remaining stitches and pull the opening closed.
Crochet the Eyes
Make two eyes using charcoal yarn.
- Chain 2.
- Work 4 double crochet stitches into the second chain from the hook.
- Fasten off, leaving a long tail for sewing.
Crochet the Beak
Using marle grey yarn, chain 2 and work 4 double crochet stitches into the second chain from the hook.
- Increase evenly to create 6 stitches.
- Work three double crochets, then increase in half treble crochet across the remaining three stitches to create 9 stitches.
- Increase in half treble crochet across the first three stitches, then work one half treble into each remaining stitch.
Fasten off, leaving a long tail. The uneven increases create the rounded, slightly hooked shape of the cockatoo’s beak.
Crochet the Crest Feathers
Make three feathers in butter-yellow yarn.
- Work 6 double crochet stitches into a magic ring.
- Work one double crochet into every stitch for three rounds.
- Fasten off, leaving a long tail for sewing.
Flatten each small tube before attaching it to the top of the head.
Crochet the Wings
Make two wings using the main white yarn.
- Chain 14.
- Beginning in the second chain from the hook, work four double crochets, five half trebles and three trebles.
- Work 8 trebles into the final chain, turning around the end of the foundation chain.
- Work back along the opposite side with three trebles, five half trebles and four double crochets.
- Fasten off, leaving a long tail for sewing.
This creates a long, rounded feather shape suitable for each side of the body.
Crochet the Tail Feather
Using white yarn, work 6 double crochet stitches into a magic ring.
Increase by three stitches on every alternate round:
- 9 stitches
- 12 stitches
- 15 stitches
- 18 stitches
- 21 stitches
Work one plain round after each increase round.
Change to butter-yellow yarn for the final two rounds, increasing to 24 stitches and then working one plain round.
Fasten off, leaving a long tail for attaching the tail to the body.
Crochet the Branch
Using brown yarn, work 6 double crochet stitches into a magic ring.
Work one double crochet into every stitch for ten rounds to create a narrow branch.
On the final round, work three branch extensions of different lengths:
- A short 4-chain branch
- A medium 6-chain branch
- A long 8-chain branch
Work back along each chain in double crochet, then continue around the main branch. Fasten off with a long sewing tail.
Crochet the Red Berries
Make two berries using red yarn.
- Work 6 double crochet stitches into a magic ring.
- Increase into every stitch to create 12 stitches.
- Work one plain round.
- Decrease around to return to 6 stitches.
- Add a small amount of stuffing.
- Fasten off with a long sewing tail.
Crochet the Large Leaf
Using bottle-green yarn, chain 16.
Work along one side of the chain using progressively taller stitches:
- Double crochet
- Half treble crochet
- Treble crochet
- Three double trebles
- Four trebles
- Two half trebles
- Two double crochets
Work three double crochets into the final chain, then crochet back along the opposite side in the reverse stitch sequence.
Fasten off, leaving a long tail for assembly.
Crochet the Small Leaf
Chain 10 in bottle-green yarn.
Work along both sides of the chain using double crochet, half treble, treble and double treble stitches, placing three double crochets into the final chain to create the pointed oval shape.
Fasten off with a long sewing tail.
Make the Hanging Ring
- Hold all strands of the silver embroidery thread together.
- Chain 8.
- Join to the beginning chain with a slip stitch to form a ring.
- Work 16 double crochet stitches around the ring.
- Join with a slip stitch and fasten off, leaving a long tail.
Assemble the Face
- Position the beak on the front of the head between approximately Rounds 5 and 10.
- Add a small amount of stuffing inside the beak before sewing it closed.
- Position the eyes between approximately Rounds 4 and 7, about ten stitches apart.
- Sew all pieces securely and hide the yarn ends inside the body.
Attach the Crest and Hanging Loop
- Flatten each yellow crest feather.
- Whip stitch the open end of each feather closed.
- Sew two feathers to the top of the head.
- Position and sew the silver hanging ring between them.
- Add the third feather behind the hanging ring.
Check that the hanging loop is centred so the cockatoo hangs upright.
Attach the Wings and Tail
- Position one wing on each side of the body at a slight angle.
- Sew around the upper and side edges, allowing the lower section to sit slightly away from the body.
- Position the tail feather at the rear of the lower body between approximately Rounds 17 and 22.
- Add a small amount of stuffing to the tail before sewing it closed in a slightly oval shape.
Assemble the Leaves and Berries
- Sew the small leaf to the upper end of the large leaf.
- Use the long tail from the large leaf to attach both leaves to the medium-length branch.
- Sew the two red berries near the top of the leaves so they hang beneath the branch.
Attach the Cockatoo to the Branch
Position the branch beneath the body.
- Using marle-grey yarn, sew the lower body securely to the branch.
- Wrap the yarn firmly around the branch three times to create the appearance of claws.
- Check that the bird remains balanced when held by the hanging loop.
- Secure and weave in all remaining yarn ends.
Alternative Yarns for This Project
A suitable substitute should be a smooth DK or 8 ply yarn that creates a dense fabric with a 3 mm hook.
- 8 ply anti-pilling acrylic – practical, washable and available in a broad colour range.
- 8 ply cotton – creates a firm ornament with crisp stitch definition.
- 8 ply cotton and acrylic blend – offers structure with a slightly softer finish.
- 8 ply wool and acrylic blend – creates a warm, soft ornament with good shape recovery.
- 8 ply machine-washable wool – gives the cockatoo a natural, softly textured finish.
Choosing the Best Substitute
Use a smooth yarn that makes the small stitches and shaping easy to see. Cotton will produce a firmer ornament, while acrylic or wool blends will be softer and slightly more flexible.
Avoid fluffy, boucle or loosely spun yarns, as they may obscure the facial details and allow stuffing to show through the body.
Colour Ideas
- White body with a traditional yellow crest
- Pale pink body with a deeper pink crest
- Grey body with a white crest
- Natural cream with mustard details
- Bright rainbow colours for a playful version
- Red, green and white for a stronger Christmas theme
Alternative Uses
- Christmas tree ornament
- Festive garland decoration
- Gift topper
- Australian-themed table decoration
- Window or door ornament
- Handmade keepsake
Care and Storage
Spot clean the ornament where possible. Avoid soaking the silver embroidery thread or heavily agitating the stuffed components.
Store the cockatoo in a dry container between seasons. Support the crest, wings and branch so they are not crushed or bent.