How to Crochet a Spiral Granny Square Cushion Cover
Create a textured cushion cover from one oversized classic granny square. The square is worked from the centre out, folded so all four corners meet at the back, then joined around a 50 cm cushion insert.
A self-striping yarn creates the spiral-like bands of colour shown in the finished project without the need to change yarn manually. This beginner-friendly pattern is an excellent way to practise treble crochet clusters, chain spaces and granny-square corners.
Project: Spiral Granny Square Cushion Cover
Pattern: P086
Craft type: Crochet
Difficulty: Beginner
Finished Measurements
| Finished width | Approximately 50 cm |
|---|---|
| Finished length | Approximately 50 cm |
| Granny square before folding | Approximately 70 cm along each side |
What You Will Need
Yarn
- 4 × 100 g balls of European Collection Spiral yarn
The original yarn is self-striping, which creates the changing bands of brown, cream, charcoal and neutral tones visible in the project photograph.
Hook and Equipment
- 4 mm crochet hook
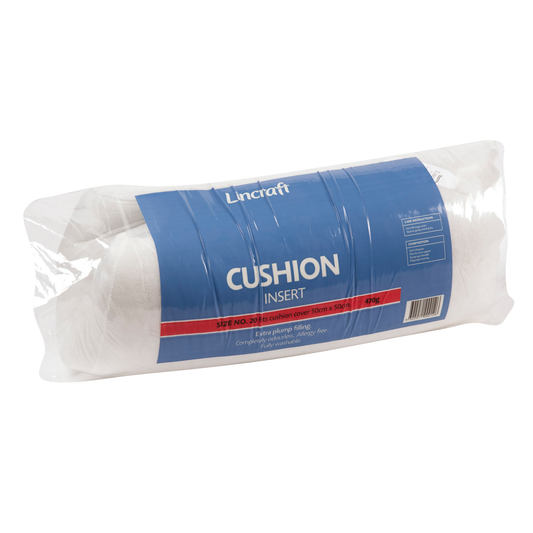
- 50 × 50 cm cushion insert
- Wool needle for weaving in ends
- Scissors
- Measuring tape
- Blocking mat and pins, if available
Tension
Exact tension is not essential for this project. The granny square is worked until it reaches the required measurement.
Use the same hook and maintain an even tension throughout so the square remains symmetrical and the sides finish at an equal length.
Abbreviations
- Ch: Chain
- Ch sp: Chain space
- Dc: Double crochet
- Tr: Treble crochet
- Sl st: Slip stitch
- Mr: Magic ring
- St or sts: Stitch or stitches
- WS: Wrong side
- RS: Right side
Construction Overview
The cushion cover is made in four stages:
- Crochet one large classic granny square.
- Continue until the square measures approximately 70 cm per side.
- Fold the corners towards the centre to form the cushion cover.
- Join the edges around a 50 × 50 cm cushion insert.
The source confirms that the entire cover is worked as a single piece and then seamed together.
Crochet the Granny Square
Begin the Centre
Using the 4 mm hook and the main yarn, make a magic ring.
Alternatively, chain 4 and join to the first chain with a slip stitch to create a small centre ring.
Round 1
- Chain 3. This counts as the first treble crochet.
- Work 2 treble crochet stitches into the magic ring.
- Chain 2.
- Work 3 trebles followed by chain 2 into the ring.
- Repeat the previous step twice more.
- Join to the third chain of the beginning chain 3 with a slip stitch.
You should have four groups of three trebles separated by four chain-2 corner spaces.
Round 2
- Chain 3. This counts as the first treble.
- In the open corner space beside the beginning chain, work 2 trebles, chain 2 and 3 trebles.
- Chain 2.
- In the next corner space, work 3 trebles, chain 2 and 3 trebles.
- Chain 2.
- Repeat the corner sequence in the remaining two corners.
- Join to the top of the beginning chain 3 with a slip stitch.
You should have eight treble clusters around the square.
Round 3
- Chain 3.
- In the adjacent corner space, work 2 trebles, chain 2 and 3 trebles.
- Chain 2.
- Work 3 trebles into the next side chain space.
- Chain 2.
- In the next corner, work 3 trebles, chain 2 and 3 trebles.
- Continue around, working one side cluster between each pair of corners.
- Join to the beginning chain with a slip stitch.
Round 4 and Following Rounds
Continue in the established classic granny-square pattern.
At every corner, work:
3 trebles, chain 2, 3 trebles
In every chain-2 space along the sides, work:
3 trebles
Separate every cluster with a chain-2 space.
- Begin each round with chain 3.
- Complete the first corner beside the beginning chain.
- Work one cluster into every side chain space.
- Work the full corner sequence into every corner.
- Join each round with a slip stitch.
Each new round adds one additional three-treble cluster along every side.
Continue to the Required Size
Continue adding rounds until the granny square measures approximately 70 cm along each side.
Measure from corner to corner along a straight side edge rather than diagonally across the square.
Fasten off securely once the required measurement has been reached.
Block the Granny Square
Blocking is optional but can make the folding and seaming process easier.
- Weave in all loose yarn ends.
- Lay the square flat with the wrong side facing upwards.
- Pin each corner into a square shape.
- Adjust all four sides until they are straight and equal.
- Wet block or steam lightly according to the yarn-care instructions.
- Allow the square to dry completely.
Fold the Cushion Cover
Lay the completed square with the wrong side facing upwards.
- Fold the first corner into the centre of the square.
- Fold the opposite corner into the centre.
- Fold the remaining two corners inwards so all four points meet.
- Check that the folded piece forms an even 50 cm square.
This folded arrangement creates the envelope-style back visible in the completed cushion.
Seam the First Two Edges
Open the folded square again and keep the wrong side facing upwards.
- Fold the square in half horizontally.
- Align the two short folded side edges.
- Using the 4 mm hook and matching yarn, double crochet the corresponding edges together on one side.
- Repeat along the opposite short side.
- Fasten off and weave in the yarn ends.
The source refers to using Colour 1 for seaming, although no separate Colour 1 is listed. Use the main yarn or a coordinating shade.
Insert the Cushion
Fold the cover back into its final shape with all four corners meeting in the centre.
- Insert the 50 × 50 cm cushion form through the remaining opening.
- Push the cushion fully into each corner.
- Smooth the crochet fabric over the cushion.
- Check that the meeting points remain centred on the back.
Close the Remaining Edges
- Align the first pair of remaining diagonal edges.
- Double crochet the two layers together using the matching yarn.
- Continue across the second diagonal edge to secure the insert fully inside the cover.
- Fasten off securely.
- Weave in all remaining yarn ends.
Alternative Removable Closure
The original instructions permanently crochet the final edges closed around the insert.
For a removable cover, consider one of these alternatives:
- Sew buttons to one folded edge and create chain-loop buttonholes.
- Add press studs inside the overlapping corners.
- Hand sew a zip into one diagonal opening.
- Use a length of ribbon or crocheted ties to secure the back.
A removable closure makes laundering the cover easier.
Final Finishing
- Check all seams and joins.
- Weave in any visible yarn ends.
- Adjust the insert so it fills all four corners evenly.
- Shape the front granny-square centre by hand.
- Gently smooth the folded back panels.
Alternative Yarns for This Project
The source recommends the specified Spiral yarn because substitutes may change the finished dimensions and appearance. When substituting, choose a yarn that creates a similar fabric with a 4 mm crochet hook.
- 8 ply self-striping acrylic – creates automatic colour changes with an easy-care finish.
- 8 ply gradient cake yarn – produces longer, gradual bands of colour.
- 8 ply wool and acrylic blend – adds warmth, softness and resilience.
- 8 ply cotton and acrylic blend – creates a firmer, smoother cushion cover.
- 8 ply cotton – produces crisp stitches and a structured square.
- Several solid 8 ply colours – allows you to create deliberate stripes by changing colour between rounds.
Choosing the Best Substitute
Choose a yarn that is durable enough for regular use and soft enough for a cushion. Smooth yarns will make the granny clusters and colour changes clearly visible.
Self-striping yarn provides the easiest way to recreate the spiral colour effect shown in the original project.
Cotton will create a heavier, firmer cover, while acrylic and wool blends will produce a softer, lighter result.
Colour Ideas
- Brown, cream, charcoal and taupe
- Rust, mustard, olive and natural
- Blush, burgundy, cream and grey
- Navy, denim, pale blue and white
- Sage, forest green, oatmeal and beige
- Rainbow self-striping yarn
- Black, white and grey for a monochrome finish
- One solid colour for a minimalist look
Alternative Uses
- Floor cushion cover
- Large decorative pillow
- Pet cushion cover
- Oversized chair pad
- Folded storage pouch
- Front panel for a matching throw cushion
Care
Follow the care instructions on the selected yarn label. When the cover has been permanently closed around the insert, spot cleaning may be the easiest option.
For washable inserts, use a gentle cycle where suitable and ensure the cushion dries completely. Reshape the square, corners and seams while damp.