How to Crochet a Honeycomb Trellis Bucket Bag
Create a practical bucket-style tote with a solid lower section, an openwork honeycomb trellis panel and a simple integrated strap. The bag body is crocheted flat without shaping, folded and seamed, then finished with a separately crocheted circular base.
The open trellis section gives the bag a light, summery appearance, while the solid lower rows provide extra structure. It is suitable for casual outings, markets, beach trips or carrying lightweight craft supplies.
Project: Honeycomb Trellis Bucket Bag
Pattern: P099
Craft type: Crochet
Difficulty: Easy
Finished Measurements
| Approximate base diameter | 19 cm |
|---|---|
| Approximate bag height | 29 cm, excluding the strap |
| Approximate strap length | 30 cm before attachment |
What You Will Need
Yarn
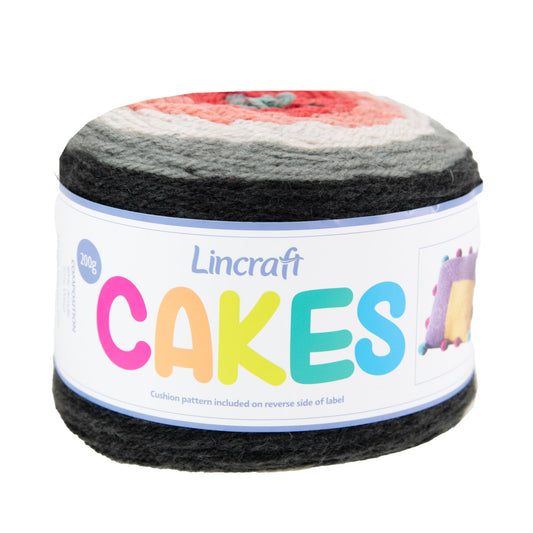
- 1 × 200 g ball of Lincraft Cakes yarn
The gradual colour changes in a cake yarn create the contrasting sections shown in the original project without requiring frequent manual colour changes.
Hook and Equipment
- 5 mm crochet hook
- Wool needle for seaming and weaving in ends
- Scissors
- Stitch markers, if desired
- Measuring tape
Tension
Exact tension is not essential for this project. However, changes in yarn thickness or crochet tension will affect the finished width, height and base size.
Aim for a firm but flexible fabric in the solid sections. The trellis section should remain open without becoming excessively loose.
Abbreviations
- Ch: Chain
- Ch sp: Chain space
- Dc: Double crochet
- Tr: Treble crochet
- Dtr: Double treble crochet
- Sl st: Slip stitch
- St or sts: Stitch or stitches
- Mr: Magic ring
Construction Overview
The bag is made in four stages:
- Crochet the main rectangular body, beginning with a solid lower section.
- Work the open honeycomb trellis panel and solid upper border.
- Continue directly into the narrow strap.
- Crochet a separate circular base, seam the body and attach the base.
The body is worked flat in rows. No shaping is required until the bag is folded and assembled.
Begin the Bag Body
Using the 5 mm hook, chain 62 stitches.
Row 1
- Work one double crochet into the second chain from the hook.
- Work one double crochet into every remaining chain.
- Turn.
You should have 61 stitches.
Rows 2–20
- Chain 1.
- Work one double crochet into the first stitch.
- Work one double crochet into every stitch across.
- Turn.
These rows form the solid lower section of the bag.
Begin the Honeycomb Trellis
Row 21
Chain 1 and work one double crochet into every stitch across. Turn.
Row 22
- Chain 1.
- Work one double crochet into each of the first two stitches.
- Chain 5 and skip the next two stitches.
- Work one double crochet into each of the next three stitches.
- Repeat the chain-5, skip-two and three-double-crochet sequence across.
- Finish with chain 5, skip two stitches and work one double crochet into each of the final two stitches.
- Turn.
Row 23
- Chain 1.
- Work one double crochet into the first stitch.
- Work 5 double crochet stitches into the next chain-5 arch.
- Skip the first double crochet of the three-stitch group, work one double crochet into the middle stitch and skip the third stitch.
- Repeat the five-double-crochet arch and middle-stitch sequence across.
- Work one double crochet into the final stitch.
- Turn.
Row 24
- Chain 6. This counts as one double treble crochet and one chain-2 space.
- Skip the first two double crochet stitches.
- Work one double crochet into each of the next three stitches.
- Chain 5 and skip the next three stitches.
- Work one double crochet into each of the next three stitches.
- Repeat across until two stitches remain.
- Chain 2 and work one double treble into the final stitch.
- Turn.
Row 25
- Chain 1.
- Work one double crochet into the double treble from the previous row.
- Work 2 double crochet stitches into the next chain-2 space.
- Skip the first stitch of the following three-stitch group, work one double crochet into the middle stitch and skip the third stitch.
- Work 5 double crochet stitches into the next chain-5 arch.
- Continue alternating a middle double crochet and five double crochets in each chain arch.
- Work 2 double crochets into the final chain-2 space.
- Work one double crochet into the fourth chain of the beginning chain 6.
- Turn.
Row 26
- Chain 1.
- Work one double crochet into each of the first two stitches.
- Chain 5 and skip three stitches.
- Work one double crochet into each of the next three stitches.
- Repeat across until five stitches remain.
- Chain 5 and skip three stitches.
- Work one double crochet into each of the final two stitches.
- Turn.
Complete the Trellis Panel
Repeat Rows 23–26 three more times.
The chain arches and grouped double crochets create the staggered honeycomb openings shown in the detail photograph on page 3 of the source pattern.
Close the Trellis Pattern
Row 33
- Chain 1.
- Work one double crochet into the first stitch and each of the next two stitches.
- Skip the next stitch.
- Work one double crochet into each of the next five stitches, then skip one stitch.
- Repeat this five-stitch sequence across.
You should return to 61 stitches.
Add the Top Border
Rows 34–36
- Chain 1.
- Work one double crochet into every stitch across.
- Turn.
These solid rows strengthen the upper edge and support the strap.
Crochet the Strap
Row 37
- Chain 1.
- Work one double crochet into the first stitch and each of the next six stitches.
- Turn.
You should have 7 strap stitches.
Row 38 and Following Rows
- Chain 1.
- Work one double crochet into every stitch across.
- Turn.
Repeat until the strap measures approximately 30 cm from its beginning.
Fasten off, leaving enough yarn for attaching the free end.
Crochet the Circular Base
Make a magic ring, chain 1 and work 6 double crochet stitches into the centre. Join with a slip stitch.
Base Round 1
Chain 1 and work 2 double crochet stitches into every stitch around.
You should have 12 stitches.
Base Round 2
Work one double crochet into the first stitch and 2 double crochets into the next stitch. Repeat around.
You should have 18 stitches.
Base Round 3
Work one double crochet into each of the first two stitches and 2 double crochets into the next stitch. Repeat around.
You should have 24 stitches.
Base Round 4
Work one double crochet into each of the first three stitches and 2 double crochets into the next stitch. Repeat around.
You should have 30 stitches.
Base Round 5
Work one double crochet into each of the first four stitches and 2 double crochets into the next stitch. Repeat around.
You should have 36 stitches.
Continue Increasing the Base
Continue increasing by six stitches on every round. Add one additional plain double crochet between each increase on every new round.
Stop when the circle measures approximately 19 cm in diameter.
Fasten off and weave in the yarn end.
Seam the Bag Body
- Fold the main panel with the right sides facing.
- Align the two side edges carefully.
- Slip stitch or sew the side seam using the matching yarn colour for each section.
- Keep the seam firm but flexible, especially through the trellis panel.
- Fasten off securely.
Attach the Strap
- Position the free end of the strap on the opposite side of the upper border.
- Check that the strap is not twisted.
- Adjust the placement until the handle sits evenly across the top of the bag.
- Sew the free end securely through several rows of the solid upper border.
- Reinforce the join with several passes of yarn.
Attach the Circular Base
- Keep the bag body inside out and position the circular base inside the lower opening.
- Align the base edge evenly around the lower edge of the body.
- Pin or clip the base in several places.
- Whip stitch the base to the bag using a wool needle and matching yarn.
- Distribute the fabric evenly so there are no gathers or puckered areas.
- Secure the yarn and weave in the end.
Finish the Bag
- Weave in all remaining yarn ends.
- Check the side seam, strap joins and circular base.
- Turn the bag right side out.
- Gently shape the base and upper border.
- Lightly block according to the yarn-care instructions.
Optional Lining
The honeycomb panel contains large openings, so a fabric lining may be useful when carrying small items.
- Cut a fabric rectangle slightly larger than the finished bag body.
- Sew the side seam to form a tube.
- Cut and attach a circular fabric base.
- Turn the upper edge under neatly.
- Hand sew the lining inside the solid top border.
A lining can also reduce stretching and add strength to the finished bag.
Alternative Yarns for This Project
A suitable substitute should be smooth enough to define the honeycomb pattern and strong enough to support the strap and contents of the bag.
- 8 ply cotton – creates a firm, durable bag with clear openwork definition.
- 8 ply cotton and acrylic blend – provides structure with a slightly lighter and softer finish.
- 8 ply anti-pilling acrylic – an affordable option available in many colours.
- 8 ply wool and acrylic blend – creates a softer bag with more stretch and warmth.
- Gradient cake yarn – recreates the gradual colour changes shown in the original project.
- Recycled cotton yarn – provides a sturdy, contemporary-looking finish.
Choosing the Best Substitute
Cotton and cotton blends are particularly suitable because they provide structure and resist excessive stretching.
Acrylic and wool blends may create a softer bag and may benefit from a lining or reinforced strap.
Avoid very fluffy, boucle or loosely spun yarns, as they may obscure the honeycomb openings and wear quickly at the handle joins.
Colour Ideas
- Blush, rust and caramel gradient
- Denim, teal and navy
- Cream, beige and chocolate
- Pastel rainbow
- Olive, sage and natural
- Solid black or charcoal
- One neutral body with a contrasting strap
Care
Follow the care instructions on the selected yarn label. Empty the bag fully before washing.
Hand wash or use a gentle cycle where suitable. Reshape the base, trellis panel and strap while damp, then dry the bag flat. Avoid hanging it while wet, as the weight may stretch the strap and openwork section.