Our log cabin blanket is worked up in nine easy to manage pieces before being seamed together to create a striking throw. Perfect for the beginner, this pattern has no shaping and uses only the knit stitch. Before commencing this pattern, knitters should be familiar with casting on, picking up stitches, knitting, slipping stitches and casting off.
How to Knit the Colourmate Log Cabin Blanket
Project: Log Cabin Blanket
Pattern: P119
Craft type: Knitting
Difficulty: Beginner
Measurements
| Size | One Size |
|---|---|
| Length | 150 |
| Width | 150 |
Yarn Required
| Yarn | 200g balls |
|---|---|
| Makr Colourmate (M) | 4 |
| Makr Colourmate (C1) | 4 |
| Makr Colourmate (C2) | 3 |
| Makr Colourmate (C3) | 3 |
Knitting Needles & Equipment
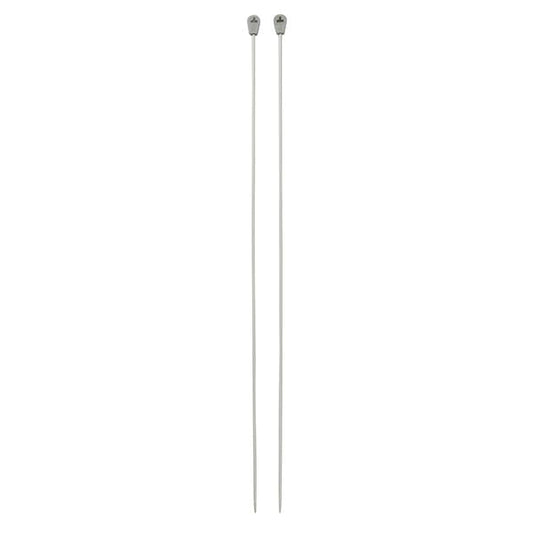
- A 5.00mm pair of needles.
- A 5.00mm circular needles, 80cm.
- Wool needle for sewing in ends.
Tension
17 sts and 29 rows to 10cm over garter st, using 5.00mm needles.
Knitting Abbreviations
- K: Knit
- Sl1: Slip One Stitch Knitwise
Please use only the yarn specified. Another yarn is likely to yield different results. Quantities are approximate as knitting styles may vary between knitters. Check the ball bands to ensure all yarn is from the same dye lot.
Blanket
BLOCK (MAKE 9 ALIKE, REFER TO ITEM A)
Casting On:
Using 5.00mm needles and C1, cast on 18 sts.
Knit each row until piece measures 10cm.
Cast off and weave in ends.
Panel Two:
With RS facing, rotate first block 90 degrees left, using C2, pick up and knit 18 sts along top edge.
Knit each row until piece measures 10cm from pick up edge.
Cast off and weave in ends.
Panel Three
With RS facing, rotate piece 90 degrees left, using C2 again, pick up and knit 36 sts along top edge.
Knit each row until piece measures 10cm from pick up edge.
Cast off and weave in ends.
Panel Four:
With RS facing, rotate piece 90 degrees right this time, using C3, pick up and knit 36 sts along top edge. This will be across the top edge of panel two and side edge of panel 3.
Knit edge row until piece measures 10cm from pick up edge.
Cast off and weave in ends.
Panel Five:
With RS facing, rotate piece 90 degrees left, using C3 again, pick up and knit 52 sts along top edge of piece. This will be across the cast off edge of panel 3 and side edge of panel 4.
Knit edge row until piece measures 10cm from pick up edge.
Cast off and weave in ends.
Panel Six:
With RS facing, rotate piece 90 degrees right, using C1, pick up and knit 52 sts along top edge of piece. This will be across the cast off edge of panel 4 and side edge of panel 5.
Knit edge row until piece measures 10cm from pick up edge.
Cast off and weave in ends.
Panel Seven:
With RS facing, rotate piece 90 degrees left, using C1, pick up and knit 68 sts along top edge of piece. This will be across the cast off edge of panel 5 and side edge of panel 6.
Knit each row until piece measures 10cm from pick up edge.
Cast off and weave in ends.
Joining Squares
Knitting Borders:
With RS facing and using M for the rest of the blanket, pick up and knit 68 sts along the cast off edge of panel 7.
Knit each row until piece measures 5cm from pick up edge.
Cast off and weave in ends.
Repeat this process for 6 of the squares.
Making Lines:
Sew the cast off edge to side of a block where the side of panels 1, 3, 5 are on one of the blocks that also has a border stripe.
Sew the cast off edge of the border on this piece to the side of panels 1, 3, 5 on one of the blocks that does not have a border stripe.
Repeat this entire process twice more so that there are three horizontal strips.
Horizontal Borders:
Taking one of the strips, with RS facing, pick up 220 sts along the cast off edges of panel 7 and the side of the borders are.
Knit each row until piece measures 5cm from pick up edge.
Cast off and weave in ends.
Repeat this process once more.
Seaming Together:
Sew together the cast off edge of the horizontal border, to the edge of the blocks when panels 1, 2, 4 and 6 are.
Repeat again, to join all blocks together.
External Border
Pick up 220 along one of the short edges of the blanket, knit every row until piece measures 10cm from where you’ve picked up the stitches.
Cast off and weave in all ends.
Repeat for the other short edge of the blanket.
Pick up 256 sts along one of the remaining long edges of the blanket, knit every row until pieces measures 10cm from where you’ve picked up the stitches.
Cast off and weave in all ends.
Repeat for the other long edge of the blanket.
Finishing
Weave in any remaining ends.
Item A: Block Panel Detail (See PDF Document)
NOTE: Refer to Item B over the page for a diagram of the fully assembled blanket and guidance on how the blocks are to be laid out.
Item B: Assembly Diagram and Working Order for Blanket (See PDF Document)
The assembly diagram on page 4 of the original pattern shows nine completed blocks arranged in a three-by-three layout. Each block follows the numbered working order from Panel 1 through Panel 7, with knitted border sections separating the blocks and an external border surrounding the completed blanket.
Alternative Yarns
The original pattern specifies Makr Colourmate 10 ply yarn. When choosing an alternative yarn, select a 10 ply or equivalent weight yarn that can achieve the original tension of 17 sts and 29 rows to 10cm over garter st using 5.00mm needles.
Suitable Yarn Types
- 10 ply acrylic yarn – a practical option for an easy-care blanket with good durability and colour availability.
- 10 ply wool blend – provides warmth and softness while retaining some of the easy-care qualities of synthetic fibres.
- 10 ply pure wool – creates a warm, breathable blanket with a natural finish but may require more careful washing.
- Cotton-blend yarn – may create a cooler, heavier blanket with clearly defined garter-stitch texture.
- Recycled fibre yarn – can be used provided the required tension and finished fabric can be matched.
Customisation Ideas
- Create a tonal blanket by choosing four shades from the same colour family for a subtle log cabin effect.
- Use contrasting colours for each panel to emphasise the geometric construction of the individual blocks.
- Choose a neutral main colour for the joining and external borders to frame brighter coloured blocks.
- Create a monochrome version using different shades of a single colour.
- Use leftover coordinating yarns for individual panel sections, provided all yarns produce compatible tension and fabric weight.
- Adjust the overall colour placement by changing which shades are assigned to C1, C2 and C3 while retaining the original panel construction.
For the most predictable finished dimensions, retain the original nine-block construction, panel stitch counts and border measurements.
Care Instructions
Always follow the washing and care instructions provided on the ball band of the yarn used for the project.
- Weave in all ends securely before washing.
- Wash using the method and temperature recommended for the selected yarn.
- Avoid excessive agitation if using wool or other fibres prone to felting.
- Gently reshape the blanket after washing.
- Lay flat to dry where appropriate to help maintain the square shape of the blocks and borders.
- Store the blanket completely dry and folded loosely.