Whether you are spoiling your sweetheart with chocolates, candy or even a ring, this Valentine’s Day this heart shaped basket is the perfect vessel. Each ball of Esther will make multiple boxes. The basket is made using a heart-shaped coaster as a base, the pattern is worked in the round using a single starting chain.
How to Crochet a Small Heart-Shaped Box
Create a small heart-shaped crochet basket for chocolates, jewellery, handwritten notes or other thoughtful gifts. The design begins with a shaped base worked around both sides of a foundation chain, then continues upwards in joined rounds to form the sides.
The finished basket is compact, decorative and ideal for Valentine’s Day, anniversaries, weddings or small handmade gift hampers.
Project: Small Heart-Shaped Box
Pattern: P160
Craft type: Crochet
Difficulty: Easy
Finished Measurement
The completed basket measures approximately 7 cm across.
What You Will Need
Yarn
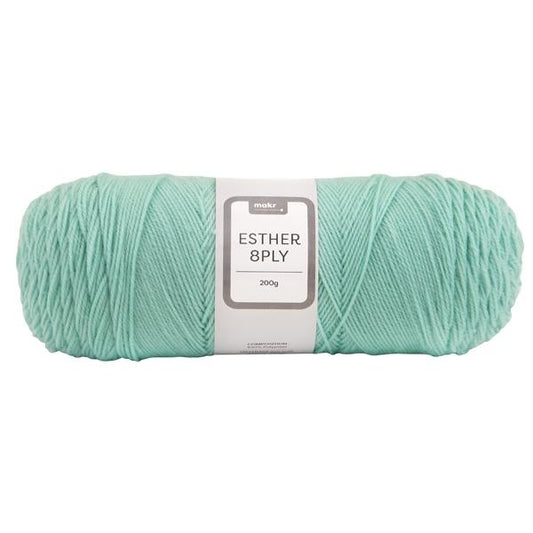
- 1 ball of Makr Esther 8 Ply yarn, 200 g
One ball will make several small baskets, depending on the finished height and individual tension.
Hook and Equipment
- 4 mm crochet hook
- Wool needle for weaving in ends
- Scissors
- Stitch marker, if desired
- Small container or form for shaping, if available
Tension
Exact tension is not important for this project. However, the basket should be worked firmly enough to hold its shape.
Use a smaller hook if the fabric feels loose or floppy. Move to a slightly larger hook if the stitches are too tight to work comfortably.
Abbreviations
- Ch: Chain
- Dc: Double crochet
- Dc2tog: Double crochet two stitches together
- Htr: Half treble crochet
- Yo: Yarn over
- Sl st: Slip stitch
- Blo: Back loop only
- St or sts: Stitch or stitches
Construction Overview
The heart-shaped box is worked in three stages:
- Crochet a flat heart-shaped base around a foundation chain.
- Work one back-loop round to turn the base into upright sides.
- Continue in joined rounds until the basket reaches the desired height.
The increases create the rounded upper sections of the heart, while the decreases form the centre indentation.
Begin the Heart Base
Using the 4 mm crochet hook, chain 16 stitches.
Round 1
- Working through the back loops only, work 2 double crochet stitches into the second chain from the hook.
- Work one double crochet into each of the next six chains.
- Work 3 double crochet stitches into the next chain.
- Work one double crochet into each of the next six chains.
- Work 2 double crochet stitches into the final chain.
- Rotate the work so you can crochet along the opposite side of the foundation chain.
- Work one double crochet into each of the next five chain loops.
- Work a double-crochet decrease through the next chain and the third chain along, skipping one chain between them.
- Work one double crochet into each of the next six loops.
- Join to the first double crochet with a slip stitch.
You should have 32 stitches.
Round 2
- Chain 1.
- Work 2 double crochet stitches into each of the first two stitches.
- Work one double crochet into each of the next seven stitches.
- Work 3 double crochet stitches into the next stitch.
- Work one double crochet into each of the next seven stitches.
- Work 2 double crochet stitches into each of the next three stitches.
- Work one double crochet into each of the next four stitches.
- Work a double-crochet decrease through the next stitch and the third stitch along, skipping the previous decrease section.
- Work one double crochet into each of the next four stitches.
- Work 2 double crochet stitches into the next stitch.
- Join to the first stitch with a slip stitch.
You should have 38 stitches.
Round 3
- Chain 1.
- Work 2 double crochet stitches into the next stitch, followed by one double crochet into the following stitch.
- Work 2 double crochet stitches into the next stitch.
- Work one double crochet into each of the next nine stitches.
- Work 3 double crochet stitches into the next stitch.
- Work one double crochet into each of the next nine stitches.
- Continue the increase sequence around the rounded sections as directed.
- Join to the first double crochet with a slip stitch.
You should have 44 stitches.
Round 4
Continue increasing around the two rounded upper sections and the lower point while maintaining the decrease at the centre indentation.
Work the stitches evenly and keep the shaping points aligned with the previous rounds.
You should have 50 stitches.
Round 5
Continue the established shaping, adding increases around the outer curves and working another double-crochet decrease across the centre dip.
Join to the first double crochet with a slip stitch, then turn the work.
You should have 56 stitches.
Turn the Base Into the Sides
Round 6
- With the wrong side facing, chain 1.
- Work one double crochet through the back loop only of every stitch around.
- Join to the first stitch with a slip stitch.
Working through the back loops creates a ridge around the base and helps the sides rise vertically.
Shape the First Side Round
Round 7
- Chain 1.
- Work one double crochet into each of the first six stitches.
- Work 2 double crochet stitches into the next stitch.
- Work one double crochet into every remaining stitch around.
- Join to the first double crochet with a slip stitch.
The single increase helps accommodate the changing shape as the side walls begin.
Continue the Basket Sides
Round 8 and Following Rounds
- Chain 1.
- Work one double crochet into every stitch around.
- Join with a slip stitch.
Repeat until the basket reaches your preferred height.
For a shallow chocolate or jewellery basket, work only a few rounds. Add more rounds for a deeper gift container.
Finish the Upper Edge
Once the basket reaches the desired height:
- Complete the final joined round.
- Fasten off securely.
- Weave the yarn end through several stitches on the inside.
- Trim the remaining tail.
A final round of slip stitch may be added when a firmer upper edge is desired.
Shape the Basket
- Gently press the lower point into shape.
- Define the centre dip by pinching the upper indentation between your fingers.
- Smooth the two rounded upper sections evenly.
- Place the basket around a small heart-shaped or rounded container while damp, if extra structure is required.
- Allow it to dry fully before filling.
Optional Decorative Edge
Add a decorative final round in a contrasting colour if desired.
Suitable edging options include:
- Slip stitch
- Reverse double crochet
- Small picots
- Alternating chain and slip-stitch loops
- A simple scalloped edge
Keep the edging small so the heart shape remains clearly defined.
Gift Ideas
- Chocolates or wrapped sweets
- A ring or small piece of jewellery
- Handwritten love notes
- Bath salts or small soaps
- Tea bags or coffee sachets
- Wedding or engagement favours
- Small craft supplies or stitch markers
- A miniature succulent in a waterproof pot
Alternative Yarns for This Project
A suitable substitute should be a smooth DK or 8 ply yarn that creates a firm, structured fabric with a 4 mm hook.
- 8 ply cotton – produces a crisp, durable basket with excellent stitch definition.
- 8 ply mercerised cotton – creates a firm basket with a subtle sheen.
- 8 ply cotton and acrylic blend – offers structure with a slightly softer finish.
- 8 ply anti-pilling acrylic – an affordable option available in many colours.
- 8 ply wool and acrylic blend – creates a softer, springier basket.
- Recycled cotton yarn – provides a sturdy, contemporary-looking finish.
Choosing the Best Substitute
Cotton is the most suitable option when you want the basket to remain firm and hold a clearly defined heart shape.
Acrylic and wool blends will create a softer basket and may require a smaller hook or light starching for additional structure.
Avoid highly fluffy, loosely spun or stretchy yarns, as they may obscure the shaping and cause the sides to collapse.
Colour Ideas
- Bright pink
- Classic red
- Blush or dusty rose
- Burgundy or wine
- White or cream
- Lavender or lilac
- Gold or metallic yarn
- Two-colour stripes
- A contrasting upper edge
Care
Follow the care directions on the yarn label. Spot cleaning is generally best for maintaining the basket’s shape.
When washing is required, reshape the heart while damp and dry it around a suitably sized container. Allow it to dry completely before storing gifts or food inside.