How to Knit a Crystal Cardigan
Knit an oversized open-front cardigan with raglan sleeves and a generous ribbed collar. The design combines stocking stitch with single rib panels, creating a relaxed garment with plenty of texture and drape.
Choose from crop, midi or maxi body lengths and either three-quarter or full-length sleeves. The fronts are worked entirely in rib without neckline shaping, while the live stitches from the fronts, sleeves and back are joined to form the oversized collar.
Project Details
- Project number: P324
- Difficulty: Intermediate knit
- Sizes: Small, Medium, Large and Extra Large
- Body options: Crop, midi and maxi
- Sleeve options: Three-quarter or full length
- Construction: Knitted flat in separate pieces
Finished Measurements
- Chest width: 52–57 (62–67–72–77–82–87) cm
- Crop length: 50 (55–60–65) cm
- Midi length: 69 (74–79–84) cm
- Maxi length: 88 (93–98–103) cm
What You Will Need
Yarn
- Crop length: 3 × 250 g balls of Makr Crystal yarn
- Midi length: 4 × 250 g balls of Makr Crystal yarn
- Maxi length: 5 × 250 g balls of Makr Crystal yarn
The yarn quantities are the same for all four sizes in the original project sheet. Consider purchasing an additional ball when lengthening the sleeves or body, changing the tension or substituting another yarn.
Needles and Equipment
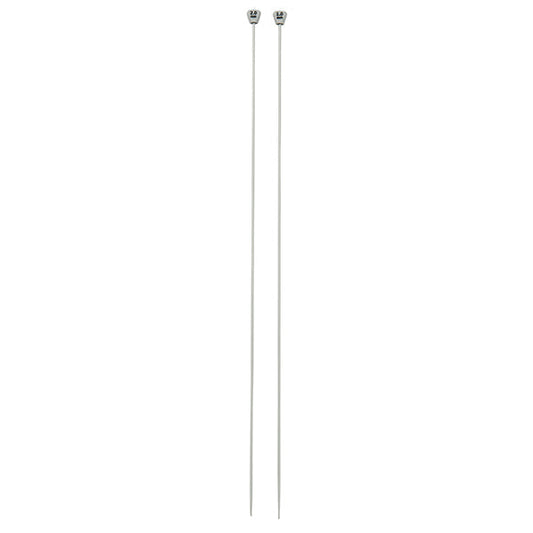
- Pair of 8.00 mm knitting needles, approximately 35 cm long
- 7.00 mm circular knitting needle, approximately 80 cm long
- 5 stitch holders or lengths of waste yarn
- Wool needle for sewing seams and weaving in ends
- Stitch markers
Alternative Yarns
The original cardigan uses a softly textured yarn with alpaca fibre and a relaxed drape. Choose a bulky or chunky-weight substitute that can achieve the required tension of 14 stitches and 17 rows to 10 cm in stocking stitch using 8.00 mm needles.
- Alpaca and wool chunky blend: The closest substitute for preserving the warmth, softness, halo and flowing drape of the original cardigan.
- Wool and acrylic chunky blend: Provides warmth and structure with improved durability and easier care.
- Brushed chunky yarn: Recreates the soft halo seen in the photographed garment. Check that the yarn is not too light or loosely spun to hold the ribbing properly.
- Chunky merino: Produces a warm, smooth cardigan with excellent stitch definition and less surface fluff.
- Chunky acrylic: An economical and easy-care choice, although the finished garment may have less drape than an alpaca blend.
- Two lighter yarns held together: Two strands may be combined where a suitable chunky yarn is unavailable, provided the tension and finished fabric closely match the pattern.
Match substitute yarn by total metreage and tension rather than ball weight. The cardigan uses a substantial amount of yarn, particularly in the midi and maxi lengths, so purchase all yarn from the same dye lot.
Tension
14 stitches and 17 rows to 10 cm over stocking stitch using 8.00 mm needles.
Knit and wash a tension square before beginning. This is particularly important because the cardigan is oversized and a small difference in tension can significantly affect its width, length and yarn requirements.
Knitting Abbreviations
- K: knit
- P: purl
- K2tog: knit two stitches together
- K2tog tbl: knit two stitches together through the back loops
- P2tog: purl two stitches together
- P2tog tbl: purl two stitches together through the back loops
- Stst: stocking stitch
- St or sts: stitch or stitches
- RS: right side
- WS: wrong side
What Is Single Rib?
Single rib, also called 1 × 1 rib, is made by alternating one knit stitch and one purl stitch across the row.
- On a right-side row, work K1, P1 repeatedly.
- On the following row, work each stitch as it appears: knit the knit stitches and purl the purl stitches.
This creates flexible vertical columns. In this cardigan, single rib is used across both fronts, through the centre of the back and sleeves, and around the oversized collar.
Choose Your Size and Length
The project sheet provides separate instructions for each size. Choose the size according to the desired finished width rather than relying only on your usual clothing size.
The row numbers shown in brackets throughout the original pattern refer to the three body or sleeve lengths:
- First row number: crop or three-quarter sleeve
- Second row number: midi or full-length sleeve
- Third row number: maxi body length
Knit the Back
Cast On
- Small: cast on 61 stitches
- Medium: cast on 71 stitches
- Large: cast on 81 stitches
- Extra Large: cast on 91 stitches
- Using 8.00 mm needles, work the first 30 rows entirely in single rib.
- After Row 30, begin working stocking stitch at each side while maintaining a wide single-rib panel through the centre.
Set the Centre Back Rib Panel
- Small: work 18 stitches in stocking stitch, 26 stitches in rib and 17 stitches in stocking stitch.
- Medium: work 22 stitches in stocking stitch, 28 stitches in rib and 21 stitches in stocking stitch.
- Large: work 26 stitches in stocking stitch, 30 stitches in rib and 25 stitches in stocking stitch.
- Extra Large: work 30 stitches in stocking stitch, 32 stitches in rib and 29 stitches in stocking stitch.
Continue in the established pattern until the beginning of the raglan shoulder shaping for the chosen body length.
Begin the Back Raglan Shaping
- Small: begin on Row 45 for crop, Row 73 for midi or Row 119 for maxi.
- Medium: begin on Row 51 for crop, Row 79 for midi or Row 125 for maxi.
- Large: begin on Row 59 for crop, Row 85 for midi or Row 131 for maxi.
- Extra Large: begin on Row 65 for crop, Row 91 for midi or Row 137 for maxi.
- On each right-side shaping row, K1, K2tog tbl, work in the established pattern to the final 3 stitches, K2tog, K1.
- Work the following wrong-side row without decreasing, keeping the centre rib correctly aligned.
- Repeat these two rows, reducing the stocking-stitch sections at both sides while preserving the centre rib panel.
- Continue until only the centre back stitches remain.
Place the Back Stitches on Hold
- Small: place 26 stitches on a holder
- Medium: place 28 stitches on a holder
- Large: place 30 stitches on a holder
- Extra Large: place 32 stitches on a holder
Knit the Fronts
Make two matching front panels. Both are worked completely in single rib and do not require neckline shaping.
Cast On Each Front
- Small: cast on 44 stitches
- Medium: cast on 48 stitches
- Large: cast on 52 stitches
- Extra Large: cast on 56 stitches
- Work every row in single rib.
- At the armhole point, place a marker at the outside edge of each front: the left edge for the left front and the right edge for the right front.
Place the Armhole Markers
- Small: after Row 44 for crop, Row 72 for midi or Row 118 for maxi.
- Medium: after Row 50 for crop, Row 78 for midi or Row 124 for maxi.
- Large: after Row 57 for crop, Row 83 for midi or Row 129 for maxi.
- Extra Large: after Row 64 for crop, Row 90 for midi or Row 136 for maxi.
- Continue in single rib after the marker until the front reaches the same total row as the completed back.
- Place all front stitches on a holder.
- Repeat for the second front.
Knit the Sleeves
Make two matching sleeves. Each sleeve begins in single rib, then changes to stocking stitch with a narrow rib panel maintained through the centre.
Cast On
- Small: cast on 32 stitches
- Medium: cast on 38 stitches
- Large: cast on 46 stitches
- Extra Large: cast on 52 stitches
Choose the Sleeve Length
- For the three-quarter sleeve, work 10 rows entirely in rib before setting the centre panel.
- For the full-length sleeve, work 30 rows entirely in rib before setting the centre panel.
Establish the Sleeve Pattern
Work stocking stitch at each side while maintaining the following single-rib centre panel:
- Small: 8 centre rib stitches
- Medium: 10 centre rib stitches
- Large: 12 centre rib stitches
- Extra Large: 14 centre rib stitches
- Increase one stitch near each edge on every sixth row.
- Work the new stitches in stocking stitch while keeping the centre rib panel unchanged.
- Continue until the required sleeve width and armhole row are reached.
Begin the Sleeve Raglan Shaping
- Small: begin at Row 46 for three-quarter sleeves or Row 66 for full sleeves.
- Medium: begin at Row 51 for three-quarter sleeves or Row 71 for full sleeves.
- Large: begin at Row 56 for three-quarter sleeves or Row 76 for full sleeves.
- Extra Large: begin at Row 66 for three-quarter sleeves or Row 86 for full sleeves.
- On every right-side shaping row, K1, K2tog tbl, work in pattern to the final 3 stitches, K2tog, K1.
- Work each wrong-side row without decreasing, maintaining the centre rib.
- Repeat until only the centre rib stitches remain.
Place the Sleeve Stitches on Hold
- Small: place 8 stitches on a holder
- Medium: place 10 stitches on a holder
- Large: place 12 stitches on a holder
- Extra Large: place 14 stitches on a holder
Join the Live Stitches for the Collar
Using the 7.00 mm circular needle, transfer the held stitches in the following order:
- Left front
- First sleeve
- Back
- Second sleeve
- Right front
Total Collar Stitches
- Small: 44 + 8 + 26 + 8 + 44 = 130 stitches
- Medium: 48 + 10 + 28 + 10 + 48 = 144 stitches
- Large: 52 + 12 + 30 + 12 + 52 = 158 stitches
- Extra Large: 56 + 14 + 32 + 14 + 56 = 172 stitches
Knit the Oversized Collar
Work backwards and forwards on the circular needle. Do not join the stitches to knit in the round.
- Small: work 30 rows in single rib
- Medium: work 34 rows in single rib
- Large: work 38 rows in single rib
- Extra Large: work 42 rows in single rib
- Maintain the K1, P1 rib across every row.
- Cast off loosely in knit stitch.
- Make sure the cast-off edge remains flexible enough for the collar to fold and drape naturally.
Assemble the Cardigan
- Match the shaped section of each front to the corresponding front edge of a sleeve.
- Sew the front-to-sleeve raglan seams, beginning at the armhole markers.
- Sew each side of the shaped back to the remaining sleeve edges.
- Join the side seams from the lower edge to the underarm.
- Join the sleeve seams from the cuff to the underarm.
- Weave in all loose yarn ends.
- Gently block the cardigan to the selected finished measurements.
Helpful Tips
Keep careful notes of the body length, sleeve length and size selected before beginning. The row numbers in the source pattern differ according to all three choices.
Place removable markers around the centre rib panels so they remain correctly aligned as the stocking-stitch sections increase or decrease.
Count the stitches after every raglan decrease row. The centre rib panel must remain unchanged while the stocking-stitch sections narrow.
Use a loose or stretchy cast-off for the collar. A tight edge will prevent the oversized collar from folding and sitting correctly.
Alpaca and other soft fibres can grow after washing. Block the tension square before measuring it and support the cardigan when drying to avoid unwanted stretching.