How to Knit a Diagonal Blanket
Create a soft, cosy blanket with a simple diagonal construction that is ideal for beginner knitters. The blanket begins with just two stitches, increases gradually to form the first corner, then decreases from the centre to create the opposite corner.
The project starts on straight needles and moves to circular needles once the growing number of stitches becomes too wide. The circular needle is used to hold the stitches comfortably while the blanket continues to be worked backwards and forwards in rows.
Project: Diagonal Knit Blanket
Pattern: P394
Craft type: Knitting
Difficulty: Easy
Finished Measurements
| Approximate width | 100 cm |
|---|---|
| Approximate length | 130 cm |
What You Will Need
Yarn
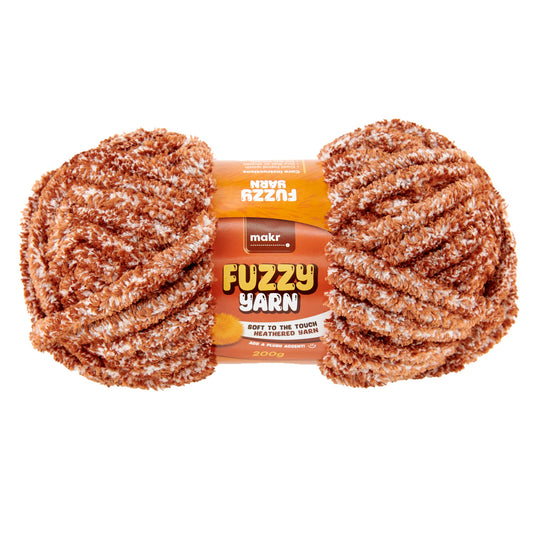
The original pattern uses Makr Fuzzy Yarn in 200 g balls:
- Colour: Nutshell
- Quantity: 6 balls
Needles and Equipment
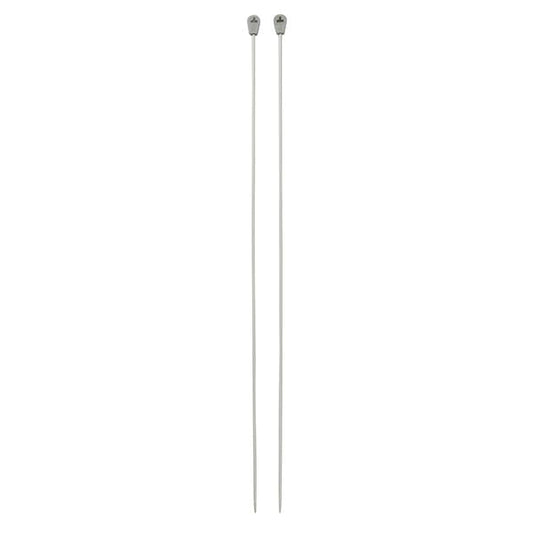
- 15 mm straight knitting needles
- 15 mm circular knitting needle
- Wool needle for sewing in ends
- Scissors
- Measuring tape
Tension
Using 15 mm needles, work to the following tension:
6 stitches and 8 rows over 10 cm in stocking stitch.
Exact tension is less critical than for a fitted garment, but a large difference will affect the finished dimensions, drape and yarn quantity.
Abbreviations
- Alt: Alternate
- Approx: Approximately
- Beg: Beginning
- Cont: Continue
- Inc: Increase
- K: Knit
- K2tog: Knit two stitches together
- Kfb: Knit into the front and back of the same stitch
- P: Purl
- St or sts: Stitch or stitches
- Stst: Stocking stitch
Construction Overview
The blanket is worked in three sections:
- Increase from the first corner.
- Work the centre section without changing the stitch count.
- Decrease towards the final corner.
The shaping is worked on the knit rows, while the alternate rows are purled.
Build the First Corner
- Cast on 2 stitches.
- Row 1: Increase into each stitch by knitting into the front and back of both stitches. You will have 4 stitches.
- Row 2 and every alternate row: Purl all stitches.
- Row 3: Knit into the front and back of the first stitch, knit to the final stitch, then knit into the front and back of the last stitch.
Continue repeating Rows 2 and 3 until there are 70 stitches on the needle.
Change to the circular needle when the stitches no longer fit comfortably on the straight needles. Continue working backwards and forwards rather than joining in the round.
Work the Centre
The centre section maintains the same number of stitches by increasing at one edge and decreasing at the other.
- Centre Row 1: Knit into the front and back of the first stitch, knit until two stitches remain, then knit the final two stitches together.
- Centre Row 2: Purl all stitches.
- Repeat these two rows once more.
You should still have 70 stitches after completing the centre section.
Shape the Final Corner
- Decrease Row: Knit two stitches together at the beginning of the row, knit to the final two stitches, then knit those two stitches together.
- Next Row: Purl all stitches.
- Repeat these two rows until only 2 stitches remain.
- Knit the final 2 stitches together.
- Cut the yarn and pull the tail through the final stitch to fasten off.
Make the Tassels
Make one tassel for each of the four corners.
- Cut six lengths of yarn measuring approximately 60 cm for each tassel.
- Hold the six lengths together and draw them halfway through an edge stitch at one corner.
- Arrange the yarn so the ends are even on both sides.
- Tie a secure knot close to the corner of the blanket.
- Repeat at the remaining three corners.
- Trim the tassels evenly so they measure approximately 30 cm long.
Finishing the Blanket
- Sew in all loose yarn ends securely.
- Lay the blanket flat and gently shape each corner.
- Check that all four tassels are securely attached.
- Trim any uneven tassel ends.
- Lightly block the blanket to the approximate finished measurements.
Alternative Yarns for This Project
The original pattern uses a soft, fuzzy, very bulky yarn. A substitute should be thick enough to achieve the stated tension on 15 mm needles while still creating a flexible, comfortable blanket.
- Super-chunky fuzzy yarn – provides the closest visual and textural match to the original.
- Super-chunky chenille yarn – creates a plush, velvety blanket with a soft drape.
- Super-chunky acrylic – an affordable, easy-care option available in a broad range of colours.
- Super-chunky wool blend – adds warmth, elasticity and a more natural finish.
- Jumbo blanket yarn – may work well if it can achieve the required tension without making the blanket too stiff.
- Two strands of chunky yarn held together – can create the required thickness when a suitable single yarn is unavailable.
Choosing the Best Substitute
Look for a yarn that can achieve approximately 6 stitches and 8 rows over 10 cm on 15 mm needles.
The yarn should be soft enough for a blanket but strong enough to withstand the weight of the finished fabric. Very loosely spun roving yarn may pill or break during regular use.
Smooth yarns will show the diagonal stitch pattern more clearly, while fuzzy or chenille yarns will create a softer and more blended surface.
Colour Ideas
- Warm rust or terracotta
- Soft cream or oatmeal
- Charcoal or deep navy
- Sage or forest green
- Blush or dusty rose
- Self-striping or marled neutral yarn
- Contrasting tassels for a playful finish
Care
Follow the care instructions on the selected yarn label. Because of the weight of the finished blanket, support it fully when washing and moving it while wet.
Gently reshape and dry flat. Avoid hanging the wet blanket, as this may stretch the diagonal fabric and distort the corners.