Knitted in our luxurious Grasslands 8ply, this sweater has a bold, fancy rib stitch pattern that is fun to knit. This garment features a snug fit and a long or short option for the sleeve. Harking back to a fifties style pullover the high neck on the sweater makes it perfect for work wear or as a smart everyday look.
How to Knit a Ladies Fitted Ribbed Pullover
Knit a fitted, vintage-inspired pullover with a high ribbed neckline, textured crossed-stitch panels and a choice of long or short sleeves. The shaped body sits close to the figure, while the buttoned opening at the back makes the neckline easier to put on and remove.
The pullover is knitted flat in separate front, back and sleeve pieces. It combines twisted rib with a decorative crossed-stitch rib pattern, making it best suited to knitters who are comfortable maintaining a textured pattern while increasing and decreasing.
Project Details
- Project number: P055
- Difficulty: Intermediate knit
- Sizes: S, M, L and XL
- Australian sizes: 8–10, 12–14, 16–18 and 20–22
- Sleeve options: Long or short
- Construction: Knitted flat in separate pieces
- Closure: Three-button opening at the back neck
Finished Measurements
- Fits bust: 80 (90–100–110) cm
- Garment bust: 80 (90–100–110) cm
- Finished length: approximately 48 (49–50–51) cm
- Long sleeve length: approximately 43 cm
- Short sleeve length: approximately 14 cm
What You Will Need
Yarn
- Grasslands 8 Ply: 12 (14–16–18) × 50 g balls
Needles and Equipment
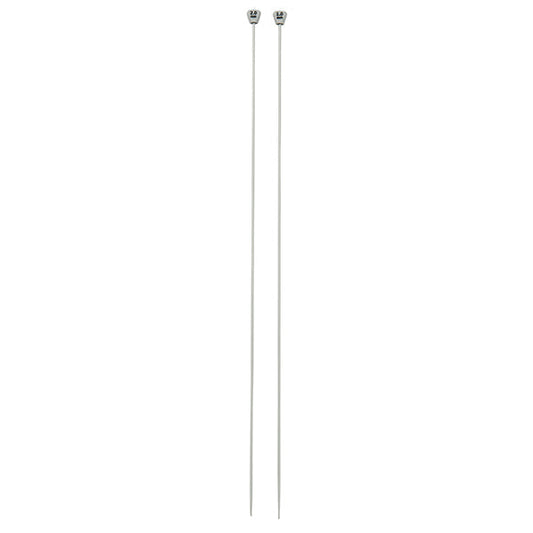
- Pair of 4.00 mm knitting needles
- Pair of 3.25 mm knitting needles
- 3.25 mm circular knitting needle, approximately 80 cm long
- 3 stitch holders
- 3 small shanked buttons
- Wool needle for sewing seams and weaving in ends
- Stitch markers, optional
Alternative Yarns
Choose a smooth DK or 8 ply yarn that can achieve both of the pattern tensions: 30 stitches and 30 rows to 10 cm in twisted rib on 3.25 mm needles, and 26 stitches and 30 rows to 10 cm in crossed-stitch rib on 4.00 mm needles.
- Machine-washable 8 ply wool: A warm and practical alternative with good elasticity and clear stitch definition.
- Merino or merino-blend 8 ply: Produces a soft, fitted garment with comfortable stretch.
- Wool and acrylic blend: Combines warmth and resilience with easier washing and reduced shrinkage.
- High-quality acrylic 8 ply: An economical and easy-care option, although the finished fabric may have less natural elasticity.
- Cotton and wool blend: Creates a cooler, structured pullover while retaining more stretch than pure cotton.
Avoid highly fluffy, boucle or novelty yarns, as they may hide the crossed stitches and make it difficult to maintain the rib pattern. Match the replacement yarn by total metreage rather than ball count.
Tension
Cuffs, Hem and Neckband
30 stitches and 30 rows to 10 cm over 1 × 1 twisted rib using 3.25 mm needles.
Main Body
26 stitches and 30 rows to 10 cm over crossed-stitch rib using 4.00 mm needles.
Knit and wash tension samples in both stitch patterns before beginning. This is especially important because the pullover is designed with little or no positive ease.
Knitting Abbreviations
- K: knit
- P: purl
- K2tog: knit two stitches together
- Kfb: knit into the front and back of the next stitch to increase one stitch
- Ktbl: knit through the back loop
- Ktfl: knit through the front loop
- Rib2tog: work two stitches together while maintaining the established rib pattern
- P2tog: purl two stitches together
- Pfb: purl into the front and back of the next stitch to increase one stitch
- Sl1: slip one stitch purlwise
- wyif: with yarn in front
- wyib: with yarn in back
- SSK: slip, slip, knit to form a left-slanting decrease
- RS: right side
- WS: wrong side
- St or sts: stitch or stitches
- Beg: beginning
- Rem: remaining
What Is Twisted Rib?
Twisted rib is a variation of ordinary ribbing in which the knit or purl stitches are worked through the back loops. This twists the base of each stitch and creates a firmer, more defined vertical rib.
In this pattern, the twisted rib is worked differently depending on whether the stitch count is odd or even.
Sizes S and L
- Row 1: *Ktbl, P1; repeat from * to the end.
- Row 2: *K1, Ptbl; repeat from * to the end.
Sizes M and XL
- Row 1: Ktbl, *P1, Ktbl; repeat from * to the end.
- Row 2: *Ptbl, K1; repeat from * to the final stitch, K1.
What Is Crossed-Stitch Rib?
Crossed-stitch rib creates raised diagonal columns by changing the order in which two neighbouring stitches are knitted. One stitch is worked before the stitch beside it, crossing the pair without using a cable needle.
Keep the working yarn relaxed while crossing the stitches. Pulling too tightly may make the fabric stiff and reduce the stretch of the rib.
Crossed-Stitch Rib Pattern
- Row 1, right side: P3, then repeat the crossed-stitch sequence and K2 sections as given in the project pattern, finishing with P1.
- Row 2: K1, *K3, P6; repeat from * to the final 3 stitches, K3.
These two rows form the main body pattern. Maintain the established crossed-stitch columns as closely as possible while shaping.
Size Instructions
The first stitch count applies to size S. Figures in brackets apply to sizes M, L and XL in that order.
Knit the Back
Work the Lower Twisted Rib
- Using 3.25 mm needles, cast on 112 (121–130–139) stitches.
- Work the twisted-rib sequence for the selected size.
- Continue until the lower band measures 9 cm.
- Finish after a wrong-side row.
Begin the Crossed-Stitch Rib
- Change to 4.00 mm needles.
- Work Rows 1 and 2 of the crossed-stitch rib pattern.
- Continue repeating these two rows, keeping the pattern aligned as the shaping is worked.
Shape the Body
- Increase one stitch at each end on the twelfth pattern row.
- Continue increasing at both ends every sixth row.
- Repeat at the interval specified for the selected size until there are 128 (137–146–155) stitches.
- Work without further shaping until the back measures approximately 32 (32–33–33) cm, or the desired length.
- Finish after a right-side row.
Shape the Armholes
- Cast off 8 stitches at the beginning of each of the next 2 rows.
- Work one wrong-side row in pattern.
- On the next row, K2tog, work in pattern to the final 2 stitches, then K2tog.
- Repeat the preceding 2 rows until 98 (107–124–133) stitches remain.
- Work without shaping until the back measures 40 (41–42–43) cm.
- Finish after a wrong-side row.
Create the Back Button Placket
- On the next right-side row, work across the first 52 (57–65–70) stitches, then turn.
- Place the remaining 46 (50–59–63) stitches on a stitch holder.
- Continue on the active stitches in the established pattern for 4 rows.
- On the following wrong-side row, P2, cast off 2 stitches, then complete the row in pattern.
- On the next row, work to the final 2 stitches, cast on 2 stitches, then K2.
- Work 6 more rows in pattern.
- Repeat the 2-stitch buttonhole sequence.
- Work 2 more rows in pattern.
Shape the First Back Neck and Shoulder
- Place the first 17 (18–19–20) stitches on a stitch holder.
- Continue on the remaining stitches.
- Decrease one stitch at the neck edge over the next 6 (6–8–8) rows.
- You should have 29 (33–38–42) stitches.
- Shape the shoulder by casting off 10 (11–12–14) stitches at the shoulder edge twice, separated by an unshaped row.
- Cast off the remaining 9 (11–14–14) stitches.
Work the Back Underlap
- Return the held 46 (50–59–63) stitches to the 4.00 mm needles.
- Rejoin the yarn at the inner edge.
- Pick up 6 stitches through the back loops along the wrong side of the button placket to form the underlap.
- Work 17 rows in the established pattern.
- Place the first 17 (18–19–20) stitches on a holder.
- Shape the second back neck and shoulder to mirror the first side.
- Cast off the remaining shoulder stitches.
Knit the Front
- Work as for the back through the armhole decreases.
- Continue without further shaping until the front measures 42 cm.
- Finish after a wrong-side row.
Divide for the Front Neck
- Work the first 42 (46–54–58) stitches and place them on a holder.
- Place the centre 14 (15–16–17) stitches on a second holder.
- Continue working across the remaining 42 (46–54–58) stitches.
Shape the First Front Neck and Shoulder
- Decrease one stitch at the neck edge on each row from Rows 2–15.
- You should have 29 (33–41–45) stitches.
- For sizes L and XL, continue the neck decreases through Rows 16–18.
- Work one row without shaping.
- Cast off 10 (11–12–14) stitches at the shoulder edge.
- Work one row.
- Repeat the shoulder cast-off once more.
- Cast off the remaining 9 (11–14–14) stitches.
Shape the Second Front Neck and Shoulder
- Rejoin the yarn at the neck edge of the held 42 (46–54–58) stitches.
- Work one row.
- Shape the second neck and shoulder to mirror the first side.
- Cast off the remaining stitches.
Knit the Long Sleeves
Make two matching sleeves.
- Using 3.25 mm needles, cast on 56 (56–66–66) stitches.
- Work in 1 × 1 twisted rib for 5 cm.
- On the final rib row, increase 2 (2–1–1) stitches.
- You should have 58 (58–67–67) stitches.
- Change to 4.00 mm needles and work in the crossed-stitch rib pattern.
- Work 6 rows, then increase one stitch at each end on the seventh row.
- Continue increasing at the specified intervals until there are 96 (98–105–107) stitches.
- Continue without shaping until the sleeve measures 43 cm, or the desired length.
Knit the Short Sleeves
Use these instructions instead of the long-sleeve section when making the short-sleeve version.
- Using 3.25 mm needles, cast on 84 (84–94–94) stitches.
- Work in 1 × 1 rib for 5 cm.
- On the final rib row, increase 1 (1–0–0) stitch.
- You should have 85 (85–94–94) stitches.
- Change to 4.00 mm needles and begin the crossed-stitch rib.
- Increase one stitch at each end at the intervals given for the selected size.
- Continue until there are 95 (99–104–108) stitches.
- Work without shaping until the sleeve measures 14 cm.
Shape the Sleeve Heads
Use these instructions for both sleeve lengths.
- Work Rib2tog at the beginning of each row until 77 (81–85–89) stitches remain.
- Then work Rib2tog at both the beginning and end of each row.
- Continue until 35 stitches remain.
- Cast off.
Knit the Neckband
- Join the shoulder seams using mattress stitch or a crochet chain join.
- Align the crossed-stitch ribs across the front and back shoulders as closely as possible.
- With the right side facing and using the 3.25 mm circular needle, work across the held back-placket stitches.
- Pick up 34 (34–35–35) stitches along the back and front neck slopes.
- Work across the centre-front held stitches, increasing 2 (1–0–1) stitches evenly.
- Pick up another 34 (34–35–35) stitches along the opposite front and back neck slopes.
- Work across the remaining held back-neck stitches.
- You should have 118 (120–124–128) stitches.
Complete the Neckband and Buttonhole
- Work backwards and forwards in twisted rib for 2.5 cm.
- Finish after a wrong-side row.
- On the next right-side row, work Ktbl, P1, Rib2tog, then continue in twisted rib to the end.
- On the following row, work in twisted rib to the final 2 stitches, cast on 2 stitches, then complete the row.
- Work 3 more rows in twisted rib.
- Cast off.
The circular needle is used only to accommodate the large number of neckband stitches. Work backwards and forwards in rows rather than joining in the round.
Assemble the Pullover
- Sew each sleeve into its armhole, matching the centre of the sleeve head to the shoulder seam.
- Join the side and sleeve seams, sewing from the body hem to the sleeve cuff in one continuous direction on each side.
- Weave in all loose yarn ends.
- Lightly steam the garment until slightly damp.
- Gently stretch and shape the pullover to the finished measurements.
- Sew the three buttons securely to correspond with the buttonholes at the back neck.
Helpful Tips
This is a close-fitting design. Compare the finished garment measurement with your actual bust measurement before selecting a size.
The crossed-stitch rib must stay aligned through the increases and decreases. Mark the beginning of each pattern repeat and check the columns frequently.
When working the back placket, label each stitch holder so the button side and underlap are not confused.
Use a loose cast-off around the neckline so the high neck remains comfortable and stretches sufficiently when dressing.
Test steam on the tension square first. Excessive heat may flatten the textured ribs or damage a substituted synthetic yarn.