Knitting beanies just got a whole lot more stylish! And, we have the perfect yarn for your next easter project! Our new Makr Spirit Glitter Yarn looks fantastic on any knit crochet project with a metallic flick of highlight – it’ll give your projects a radiant touch of glamour. This is a fun creative project for beginner knitters and the petals can be made in any colour combination with as many petals as you like.Make a chic beanie in all the glittery colors with this quick and easy-to-follow pattern!


How to Knit a Chic Beanie with Petal Embellishments
Knit a dramatic, slouchy beanie with a softly pointed crown and a cluster of decorative knitted petals. The beanie is worked flat in garter stitch using two strands of yarn held together, then folded and seamed.
The petals are knitted separately in different shapes and sizes before being arranged around one side of the finished beanie. The project sheet shows both a light, mixed-colour version and a black version with pink, green and neutral petals.
Project Details
- Project number: P315
- Difficulty: Easy knit
- Size: One size
- Construction: Knitted flat and seamed
- Main stitch: Garter stitch
- Embellishment: Separately knitted petals and buds
Finished Measurements
- Circumference at lower edge: approximately 58 cm
- Height: approximately 28 cm
What You Will Need
Yarn
The original project uses Makr Spirit Glitter yarn in 170 g balls. The beanie is knitted with two strands held together.
Light Beanie
- Main colour 1: Doeskin, one strand
- Main colour 2: Dusty Pink, one strand
- Petal colours: Black, Celadon, Doeskin and Grey
Dark Beanie
- Main colour: Black, two strands held together
- Petal colours: Dusty Pink, Black, Celadon and Doeskin
The petals use only small amounts of yarn, so leftover coordinating colours may be used.
Needles and Equipment
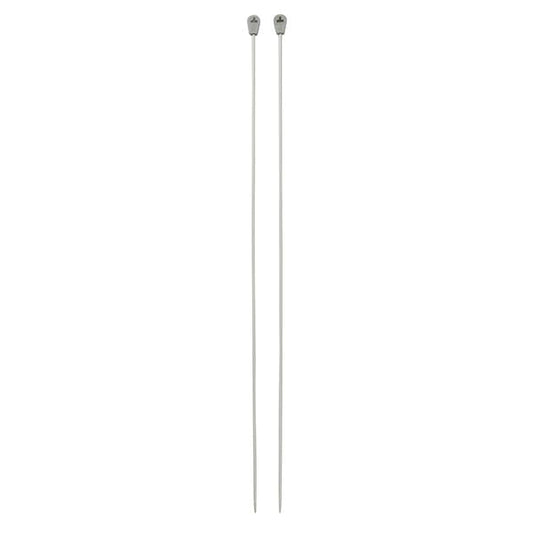
- Pair of 15.00 mm knitting needles, approximately 30 cm long
- Pair of 10.00 mm knitting needles, approximately 30 cm long
- Pair of 5.00 mm knitting needles, approximately 30 cm long
- Wool needle for sewing seams and attaching petals
- Dressmaking pins for positioning the petals
Needle Size Note
The equipment list specifies 10.00 mm needles, but the instructions for Petal 4 and the petal bud specify 12.00 mm needles. Use 12.00 mm needles for those pieces where available, or use the closest needle size that creates the intended loose, textured fabric.
Alternative Yarns
Choose a soft chunky or super-chunky yarn that can achieve approximately 11 stitches and 15 rows to 10 cm in garter stitch using 15.00 mm needles when two strands are held together.
- Two strands of chunky acrylic held together: An economical, easy-care option that will create a substantial beanie.
- Two strands of chunky wool or wool blend: Produces a warm beanie with good elasticity and stitch definition.
- Two strands of brushed or lightly textured yarn: Creates a soft surface similar to the original, although the petal details may appear less defined.
- One strand of suitable jumbo yarn: May replace the doubled yarn where it achieves the stated tension and produces a soft, flexible fabric.
- Metallic or sparkle yarn: Recreates the glittered finish of the original project.
- Plain yarn with a metallic carry-along thread: Adds subtle shimmer without requiring a dedicated glitter yarn.
Match substitute yarn by tension and total metreage rather than ball weight. Avoid very stiff yarns, as the finished beanie needs enough flexibility to fold and drape naturally.
Use yarns of a similar thickness for the petals. A much finer or heavier yarn may alter their size and make the arrangement difficult to balance.
Tension
- Single strand on 5.00 mm needles: 16 stitches and 27 rows to 10 cm in garter stitch
- Two strands on 15.00 mm needles: 11 stitches and 15 rows to 10 cm in garter stitch
Knit a tension sample before beginning. The beanie has a finished lower circumference of approximately 58 cm, so a significant difference in tension will affect its fit.
Knitting Abbreviations
- K: knit
- P: purl
- K2tog: knit two stitches together
- K3tog: knit three stitches together
- P5tog: purl five stitches together
- K into front and back: knit into the front and back of one stitch to increase one stitch
- St or sts: stitch or stitches
- Tog: together
What Is Garter Stitch?
Garter stitch is created by knitting every row. It produces a reversible fabric with horizontal ridges and does not curl at the edges.
The beanie and most of the petal pieces are worked primarily in garter stitch.
What Does “Two Strands Held Together” Mean?
Hold two separate strands together and treat them as one strand throughout the stitch.
- Use one strand from each of two balls, or pull one strand from the centre and one from the outside of the same ball.
- Hold both strands together when casting on and knitting every stitch.
- Check regularly that both strands have been caught in each stitch.
For the light beanie, hold one strand of Doeskin together with one strand of Dusty Pink. For the dark beanie, hold two strands of Black together.
Knit the Beanie
- Using 15.00 mm needles, two strands of the main yarn and the long-tail cast-on method, cast on 40 stitches.
- Row 1: Knit.
- Row 2: K1, K2tog, knit to the final 3 stitches, K2tog, K1. 38 stitches remain.
- Repeat Rows 1 and 2, decreasing two stitches on every second row, until 10 stitches remain.
- Cast off the remaining stitches loosely.
- Leave a yarn tail approximately 40 cm long for sewing the beanie.
Knit Petal 1
Use one strand of yarn and 5.00 mm needles.
For the light beanie, make Petal 1 in Dusty Pink and Black. For the dark beanie, make two in Celadon.
- Row 1: Cast on 2 stitches.
- Row 2: Knit.
- Row 3: Knit into the front and back of each stitch. 4 stitches.
- Row 4: K1, increase into each of the next 2 stitches, K1. 6 stitches.
- Row 5: K1, increase into the next stitch, knit to the final 2 stitches, increase into the next stitch, K1. 8 stitches.
- Continue increasing one stitch near each edge until there are 12 stitches.
- Knit 4 rows without shaping.
- Next decrease row: K1, K2tog, knit to the final 3 stitches, K2tog, K1. 10 stitches.
- Continue decreasing one stitch near each edge as established until only 3 stitches remain.
- Knit the final 3 stitches together.
- Cut the yarn and draw it through the final stitch.
Petal 1 Stitch-Count Note
The source sheet directs the knitter to repeat its increase and decrease rows until the stated stitch counts are reached, but its printed row numbering does not align perfectly with those counts. Follow the shaping sequence and use the stated stitch counts as the guide.
Knit Petal 2
Make two using one strand of yarn and 5.00 mm needles.
For the light beanie, use Celadon and Grey. For the dark beanie, use Celadon.
- Row 1: Cast on 2 stitches.
- Row 2: Knit.
- Row 3: Knit into the front and back of each stitch. 4 stitches.
- Row 4: Knit.
- Row 5: K1, increase into each of the next 2 stitches, K1. 6 stitches.
- Row 6: Knit.
- Row 7: K1, increase into the next stitch, knit to the final 2 stitches, increase into the next stitch, K1. 8 stitches.
- Rows 8–16: Knit.
- Row 17: K1, K2tog, knit to the final 3 stitches, K2tog, K1. 6 stitches.
- Row 18: Knit.
- Row 19: K1, K2tog twice, K1. 4 stitches.
- Row 20: Knit.
- Row 21: K1, K2tog, K1. 3 stitches.
- Row 22: Knit.
- Row 23: Knit the final 3 stitches together.
- Cut the yarn and draw it through the remaining stitch.
Knit Petal 3
Make two for each beanie using one strand of Doeskin and 5.00 mm needles.
- Row 1: Cast on 2 stitches.
- Row 2: Knit.
- Row 3: Knit into the front and back of each stitch. 4 stitches.
- Row 4: K1, increase into each of the next 2 stitches, K1. 6 stitches.
- Row 5: Knit.
- Row 6: K1, K2tog twice, K1. 4 stitches.
- Row 7: K1, K2tog, K1. 3 stitches.
- Row 8: Knit the final 3 stitches together.
- Cut the yarn and draw it through the remaining stitch.
Knit Petal 4
Use two strands of yarn and 12.00 mm needles, or the closest available larger needle.
For the light beanie, use Celadon. For the dark beanie, use Dusty Pink.
- Row 1: Cast on 2 stitches.
- Row 2: Knit.
- Row 3: Knit into the front and back of each stitch. 4 stitches.
- Row 4: K1, increase into each of the next 2 stitches, K1. 6 stitches.
- Row 5: K1, then knit each stitch to the final stitch while wrapping the yarn three times around the needle for every stitch. K1.
- Row 6: K1, purl each wrapped stitch while allowing the extra loops to drop from the needle, then K1.
- Row 7: K1, K2tog twice, K1. 4 stitches.
- Row 8: K1, K2tog, K1. 3 stitches.
- Row 9: Knit the final 3 stitches together.
- Cut the yarn and draw it through the remaining stitch.
Knit the Petal Bud
Use two strands of yarn and 12.00 mm needles, or the closest available larger needle.
For the light beanie, use Dusty Pink. For the dark beanie, use Black.
- Cast on 5 stitches.
- Purl all 5 stitches together.
- Cut the yarn and draw it through the remaining stitch.
- Use the yarn tail to curl or gather the small piece into a rounded bud.
Seam the Beanie
- Lay the beanie flat with the wrong side facing upwards.
- Fold the knitting in half so the shaped cast-off edges meet.
- Sew the short cast-off edges together.
- Continue sewing down the long side edges to form the back seam.
- Weave the yarn ends into the seam.
- Turn the beanie right side out so the seam is concealed inside.
Arrange and Attach the Petals
- Weave the loose yarn ends into the edges of each petal, leaving one suitable tail for attaching it.
- Arrange the petals in a cluster on one side of the beanie.
- Place the largest petals at the back or lower part of the arrangement.
- Layer the smaller petals and buds over them to create depth.
- Pin every piece in position before sewing.
- Try on the beanie carefully to check the placement.
- Sew around the centre or lower portion of each petal, leaving the outer edges free where a more dimensional effect is desired.
- Secure the petal buds firmly in the centre of the arrangement.
- Weave all remaining yarn ends into the inside of the beanie.
Helpful Tips
The petal layout shown on page 3 is a guide only. The number, size and colour of petals may be changed to create a different arrangement.
Pin every petal before sewing. The completed cluster can become heavy, so distribute the pieces over a broad enough area to prevent the beanie from pulling to one side.
Check regularly that both strands of yarn are being worked together in the main beanie.
When making the elongated stitches in Petal 4, keep the three wraps loose enough to slide from the needle on the following row.
Beads, sequins or other decorations should be attached particularly securely. This embellished beanie is not suitable for babies or young children where small detachable pieces could present a hazard.